Introduction
1. Building a Camera System
1.1 The Difficulty of Connecting an Image Sensor to Your System
If you have an adequate budget, the easiest way is to buy the off-the-shelf industrial camera and use it as is. But if you decide to design a camera using an image sensor from scratch, you will face the following questions:
- Where can I get the sensor datasheet?
- Which camera interface should I use?
- Should I write a sensor driver?
- How to bring up the sensor?
- Does the image quality meet my needs?
If you are lucky to have the answers to the first few questions and move to the last question but found out the image quality or performance doesn’t satisfy your needs, then you have to roll back to the very first question again.
For a long time building a camera system requires expertise not only on coding but also on the understanding of sensor hardware and its timing. It is a really pain to write and debug the camera driver from scratch. Understanding the sensor timing is the key to bring up the camera, but you might miss the essential sensor datasheet, register reference, application note that are always under NDA from the sensor vendors like Sony, ONSemi, OmniVision, etc. Hardware diagnostic tools like high-end oscilloscope, logic analyzer, protocol analyzer are quite helpful for sensor debugging though far way expensive for hobbyists or small teams.
1.2 Camera Evaluation Kit Now Saves Your Time
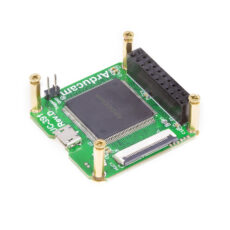
Camera Evaluation Kit is equipped with Arducam USB camera shield, which is a basic camera building block that helps you to create a USB camera as easily as Lego bricks. Together with other camera building blocks from Arducam, like the camera breakout board, the MIPI adapter board, or the HISPI adapter board, you can stack them together to DIY a USB camera. Camera driver and software is ready for Windows, Linux for both PC and embedded ARM devices. The only thing is selecting the right configuration file for your camera setup, then starting an analysis of the video stream. It helps you reduce camera development from months to minutes.
1.3 Customizable and More Possibilities
Arducam Camera Evaluation Kit comes with a comprehensive SDK that allows you to develop your application software and integrates the camera into your system. The SDK is an Arducam proprietary USB camera software framework that hides the camera complex hardware/software details with a friendly uniformed user interface. If you happen to have a sensor that does not in the Arducam camera catalog, you can consult Arducam camera specialist for support. It proofs that Arducam Camera Evaluation Kit solution is not only a fast prototyping and evaluation tool but also a ready to go camera component.
2. Understanding Arducam Camera Evaluation Kit Solution
2.1 What is Arducam Camera Evaluation Kit?
Arducam Camera Evaluation Kit is based on the USB camera shield solution, which is a basic USB camera building block that hides the complexity of hardware and software details and offers friendly uniformed hardware and software interface for a camera system developer. Working together with other Arducam camera building blocks like camera breakout boards and camera adapter boards, users can build a camera in minutes.For other camera solutions instead of USB, please check Arducam SPI and MIPI CSI-2 camera solutions for Arduino, Raspberry Pi, and NVIDIA Jetson boards.
2.2 What kind of sensors it supports
The Camera Evaluation Kit can support any image sensor ranging from 0.3MP~200MP with the correct adapter board combination. Nowadays the popular image sensor interface types are parallel (AKA DVP), MIPI (AKA CSI-2), LVDS, HSPI, etc. Arducam now implemented the parallel and MIPI interface and has separate adapter boards for them. Other sensor interface type will only be supported by customization.
2.3 What are the other camera building blocks
The Camera Evaluation Kit can not work alone, it should work with the other camera building blocks to become a complete camera. Camera breakout is the most important building block, which composes of an optical lens and sensor module. The output of the camera breakout is either a pin header or a flex cable connector that can well mate with the USB camera shield. You can find more detailed information in the following chapter.
2.4 What kind of backend hardware it supports
The Camera Evaluation Kit is a USB device, which works with any hardware platforms like PC, laptop, or embedded ARM devices as long as they come with a USB host interface. On different hardware platforms, the USB driver and SDK might vary, they will be device-dependent. Check the Camera Evaluation Kit specification for the detailed support list.
2.5 What kind of Operating System it supports
It supports the Windows and Linux OS at the moment, which covers the most use-cases. We also have success stories from our users who made it working on MAC OS as well.
2.6 What kind of Programming Language the SDK and code example supports
It supports C/C++ and python programming languages. We built several example codes using OpenCV that helps users to migrate their existing OpenCV code much easier. We also have success stories from our users who wrote the wrapper for Java.
3. How to build Your Hamburger Camera
When you come to a McDonald restaurant, you have options to build your hamburger meal. Arducam Camera Evaluation Kit uses the same concept to build your hamburger camera by selecting the camera building blocks. Although Arducam has already built several popular camera bundle kits, if they are not what you need, you can follow the steps below to build your camera.
3.1 Step1: Pick up a USB2 or USB3 camera evaluation kit
Choose the Camera Evaluation Kit depends on the bandwidth budget of your application. The USB2 only allows 480Mbps (40MB/s max) bandwidth and all devices on the same root hub will share this bandwidth. USB2 is good for the host only support USB2 or then bandwidth is enough for the camera breakout board. Or else you have to consider the USB3 camera shield for faster frame rate or connecting multiple cameras at the same time.
3.2 Step2: Choose a camera breakout board
To choose the right camera, you have to define your camera specifications in terms of the resolution, pixel size, frame rate, sensor interface, lens mount, color/monochrome, IR sensitive or not, etc. Then you can choose the closest camera breakout board to evaluate further customization.
3.4 Matrix selection table for building a camera
| USB Camera Shield Camera | Breakout Board Type | Adapter Board |
|---|---|---|
| USB2 Rev.D (UC-391 Rev.D) | Parallel pin-header/flex | |
| USB2 Rev.E (UC-391 Rev.E) | Parallel flex only/MIPI | |
| USB3 Rev.C (UC-425) | Parallel-8bit flex | |
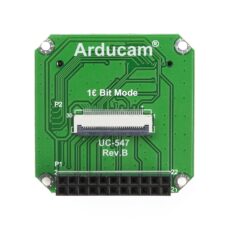
| USB3 Rev.C (UC-425) | Parallel-8bit pin-header | Parallel (UC-547) |
| USB3 Rev.C (UC-425) | Paralle-10/12bit | Parallel (UC-547) |
| USB3 Rev.C (UC-425) | MIPI | MIPI (UC-628) |
| USB3 Rev.C (UC-425) | Parallel x2 | Stereo Parallel (UC-467) |
| USB3 Rev.C (UC-425) | MIPI x2 | Stereo HAT (UC-625) |
Discontinued, please check the upgraded version: B0419
Arducam Parallel Camera Adapter Board for USB3 Camera Shield
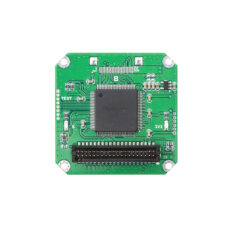
Arducam MIPI Adapter Board for USB3 Camera Shield:
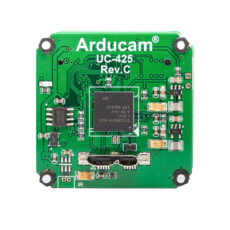
ArduCAM USB3.0 Camera Shield is discontinued.
Please check the upgrade version B0317 Here.
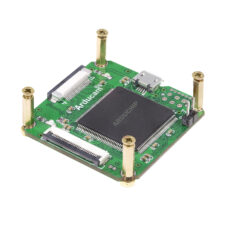
Arducam USB2 Camera Shield:
5. Video Tutorial
Related Docs
Introduction of USB2 Camera Shield
Introduction of USB3 Camera Shield
Introduction of USB3 Camera Shield Plus
Quick Start Guide - Camera Evaluation Kit Windows Driver Installation
Quick Start Guide - Camera Evaluation Kit Windows GUI
Quick Start Guide - Camera Evaluation Kit External Trigger Tutorial
Application Note - ESP32 S3 Camera Evaluation Kit
Application Note - 2MP Mira220 USB3 Camera Evaluation Kit
Application Note - 108MP USB3 Camera Evaluation Kit
Application Note - 2MP OG02B10 USB3 Camera Evaluation Kit
Application Note - OG0VA1B External Trigger Note
Application Note - OG01A1B External Trigger Note
Application Note - OX05B1S External Trigger Note
