Quick-Start-Guide
Abstract
This page is mainly designed and developed for the Quick Start Guide of Arducam cameras on NVIDIA Jetson Nano/Xavier NX/Orin Nano/Orin NX. For another NVIDIA Jetson Platforms, please refer to the following index to land in the corresponding pages:
Quick Start Guide for Arducam Cameras on NVIDIA Jetson AGX Orin
Hardware Connection
Camera for NVIDIA Jetson Nano/Xavier NX
Click to Expand
- Locate the camera connector (CSI). It’s on the side of the carrier board, opposite to the GPIO pins.
- Pull up on the plastic edges of the camera port. Do it gently to avoid pulling it off.
- Push in the camera ribbon. Make sure the contacts are facing the heatsinks. Do not bend the flex cable, and make sure it’s firmly inserted into the bottom of the connector.
- Push the plastic connector down. Do it while holding the flex cable until the connector is back in place.
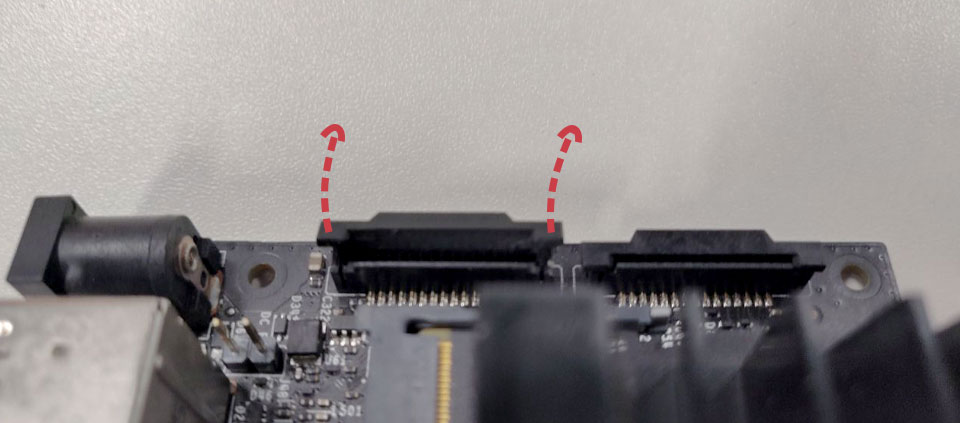
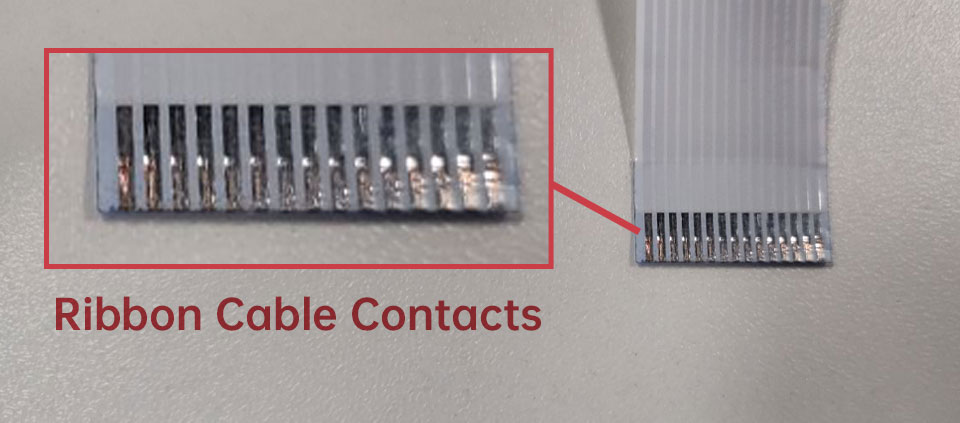 Ribbon Cable Contacts – 15pin-15pin
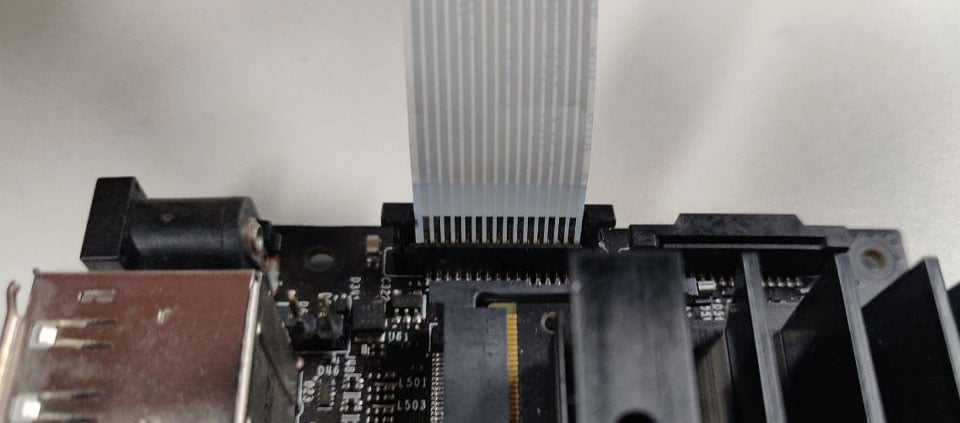 Silver Contacts facing inside to the heatsinks
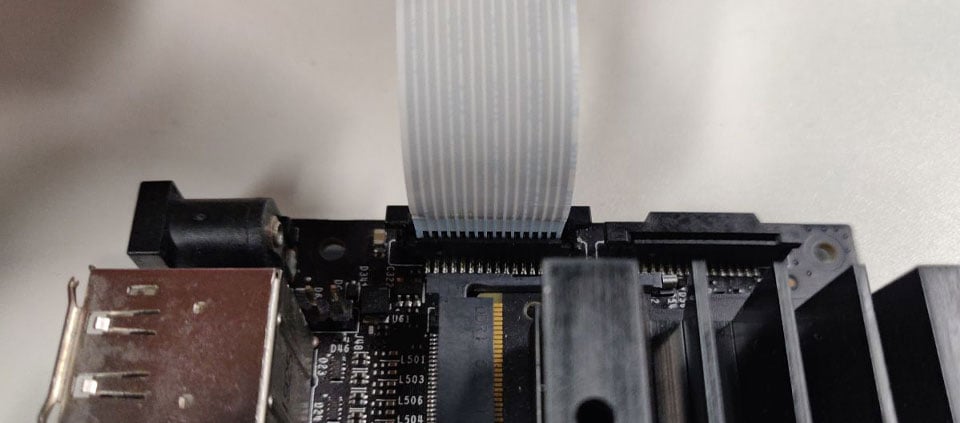 Ribbon cable fully inserted to the bottom of the CSI connector
Camera for NVIDIA Orin Nano/Orin NX
- Locate the camera connector (CSI). It’s on the side of the carrier board, opposite to the GPIO pins.
- Pull up on the plastic edges of the camera port. Do it gently to avoid pulling it off.
- Push in the camera ribbon. Make sure the contacts are facing the heatsinks. Do not bend the flex cable, and make sure it’s firmly inserted into the bottom of the connector.
- Push the plastic connector down. Do it while holding the flex cable until the connector is back in place.
Diagram - NVIDIA Jetson Orin Nano
15pin-22pin FPC Cable

22pin-22pin FFC Cable

Diagram - NVIDIA Jetson Orin NX
15pin-22pin FPC Cable

22pin-22pin FFC Cable

Software
Preparation
1.Please confirm that you are using the official NVIDIA Jetson Carrier Board
Note
The Third-party carrier boards are not guaranteed to work.
2.Please confirm that you are using the supported JetPack version
You can find the Supported JetPack Version on Different NVIDIA Jetson Platforms as follows:
Supported JetPack Version on Different NVIDIA Jetson Platforms
Install driver
Note
To successfully install the camera driver on your Jetson, please ensure the following:
-
Use NVIDIA Developer Kit: Make sure you are using the official carrier board, not a third-party one. Our driver is compatible with the official carrier board, and using a third-party board will prevent successful installation.
-
Check Jetpack Version: Ensure that the Jetpack version on your Jetson is within the supported list.
-
8MP IMX219 Camera
For the imx219, you don't need to install any drive:
imx219 Board list:
| Resolution | Camera Module |
|---|---|
| 8MP | imx219 |
-
12MP IMX477 Camera
For the imx477, you need to install the following steps:
imx477 Board list:
| Resolution | Camera Module |
|---|---|
| 12MP | imx477 |
Step 1. Download the bash scripts
cd ~
wget https://github.com/ArduCAM/MIPI_Camera/releases/download/v0.0.3/install_full.sh
Step 2. Install the driver
chmod +x install_full.sh
./install_full.sh -m imx477
-
12MP IMX708 Camera
For the imx708 camera module, you will need to refer to the following steps:
imx708 Board list:
| Resolution | Camera Module |
|---|---|
| 12MP | imx708 |
Step 1. Download the bash scripts
cd ~
wget https://github.com/ArduCAM/MIPI_Camera/releases/download/v0.0.3/install_full.sh
Step 2. Install the driver
chmod +x install_full.sh
./install_full.sh -m imx708
-
16MP IMX519 Camera
For the imx519, you need to install the following steps:
imx519 camera Board list:
| Resolution | Camera Module |
|---|---|
| 16MP | imx519 |
Step 1. Download the bash scripts
cd ~
wget https://github.com/ArduCAM/MIPI_Camera/releases/download/v0.0.3/install_full.sh
Step 2. Install the driver
chmod +x install_full.sh
./install_full.sh -m imx519
Using Gstreamer access camera
1.View the Pixel format
v4l2-ctl --list-formats-ext
2.Preview
If you want to use ssh connection, please export DISPLAY=:0
sensor_id=0 # 0 for CAM0 and 1 for CAM1 ports
Framerate=30
gst-launch-1.0 nvarguscamerasrc sensor_id=$sensor_id ! "video/x-raw(memory:NVMM),width=1920,height=1080,framerate=$Framerate/1,format=NV12" ! nvvidconv flip-method=0 ! "video/x-raw,width=960,height=720" ! nvvidconv ! nvegltransform ! nveglglessink -e
3.Capture video
SENSOR_ID=0 # 0 for CAM0 and 1 for CAM1 ports
FRAMERATE=30 # Framerate can go from 2 to 60 for 1920x1080 mode
gst-launch-1.0 -e nvarguscamerasrc sensor-id=$SENSOR_ID ! "video/x-raw(memory:NVMM),width=1920,height=1080,framerate=$FRAMERATE/1" ! nvv4l2h264enc ! h264parse ! mp4mux ! filesink location=rpi_v3_imx477_cam$SENSOR_ID.mp4
4.Streaming
4.1 Streaming Sever
gst-launch-1.0 v4l2src device=/dev/video0 ! video/x-raw,format=GRAY8,width=2560,height=800 ! nvvidconv ! 'video/x-raw(memory:NVMM), format=(string)I420' ! omxh264enc profile=high cabac-entropy-coding=true insert-sps-pps=true iframeinterval=60 ! 'video/x-h264, level=(string)4.2, stream-format=(string)byte-stream' ! tcpserversink host=0.0.0.0 port=5001 -v
4.2 Streaming Client
Please exit the virtual machine created with anacondac, or you can install conda install gst-libav -c conda-forge
gst-launch-1.0 -v tcpclientsrc host=0.0.0.0 port=5001 ! decodebin ! fpsdisplaysink sync=false text-overlay=false
or
gst-launch-1.0 -ve tcpclientsrc host=0.0.0.0 port=5001 ! decodebin ! autovideosink
autovideosink: Preview. If does not work, please tryximagesink(xvimagesink),glimagesink,d3dvideosink(Windows).