Quick Start Guide
Quick Start Guide-Dual*AR0234 GMSL Camera Extension Kit
Hardware
Hardware Preparation
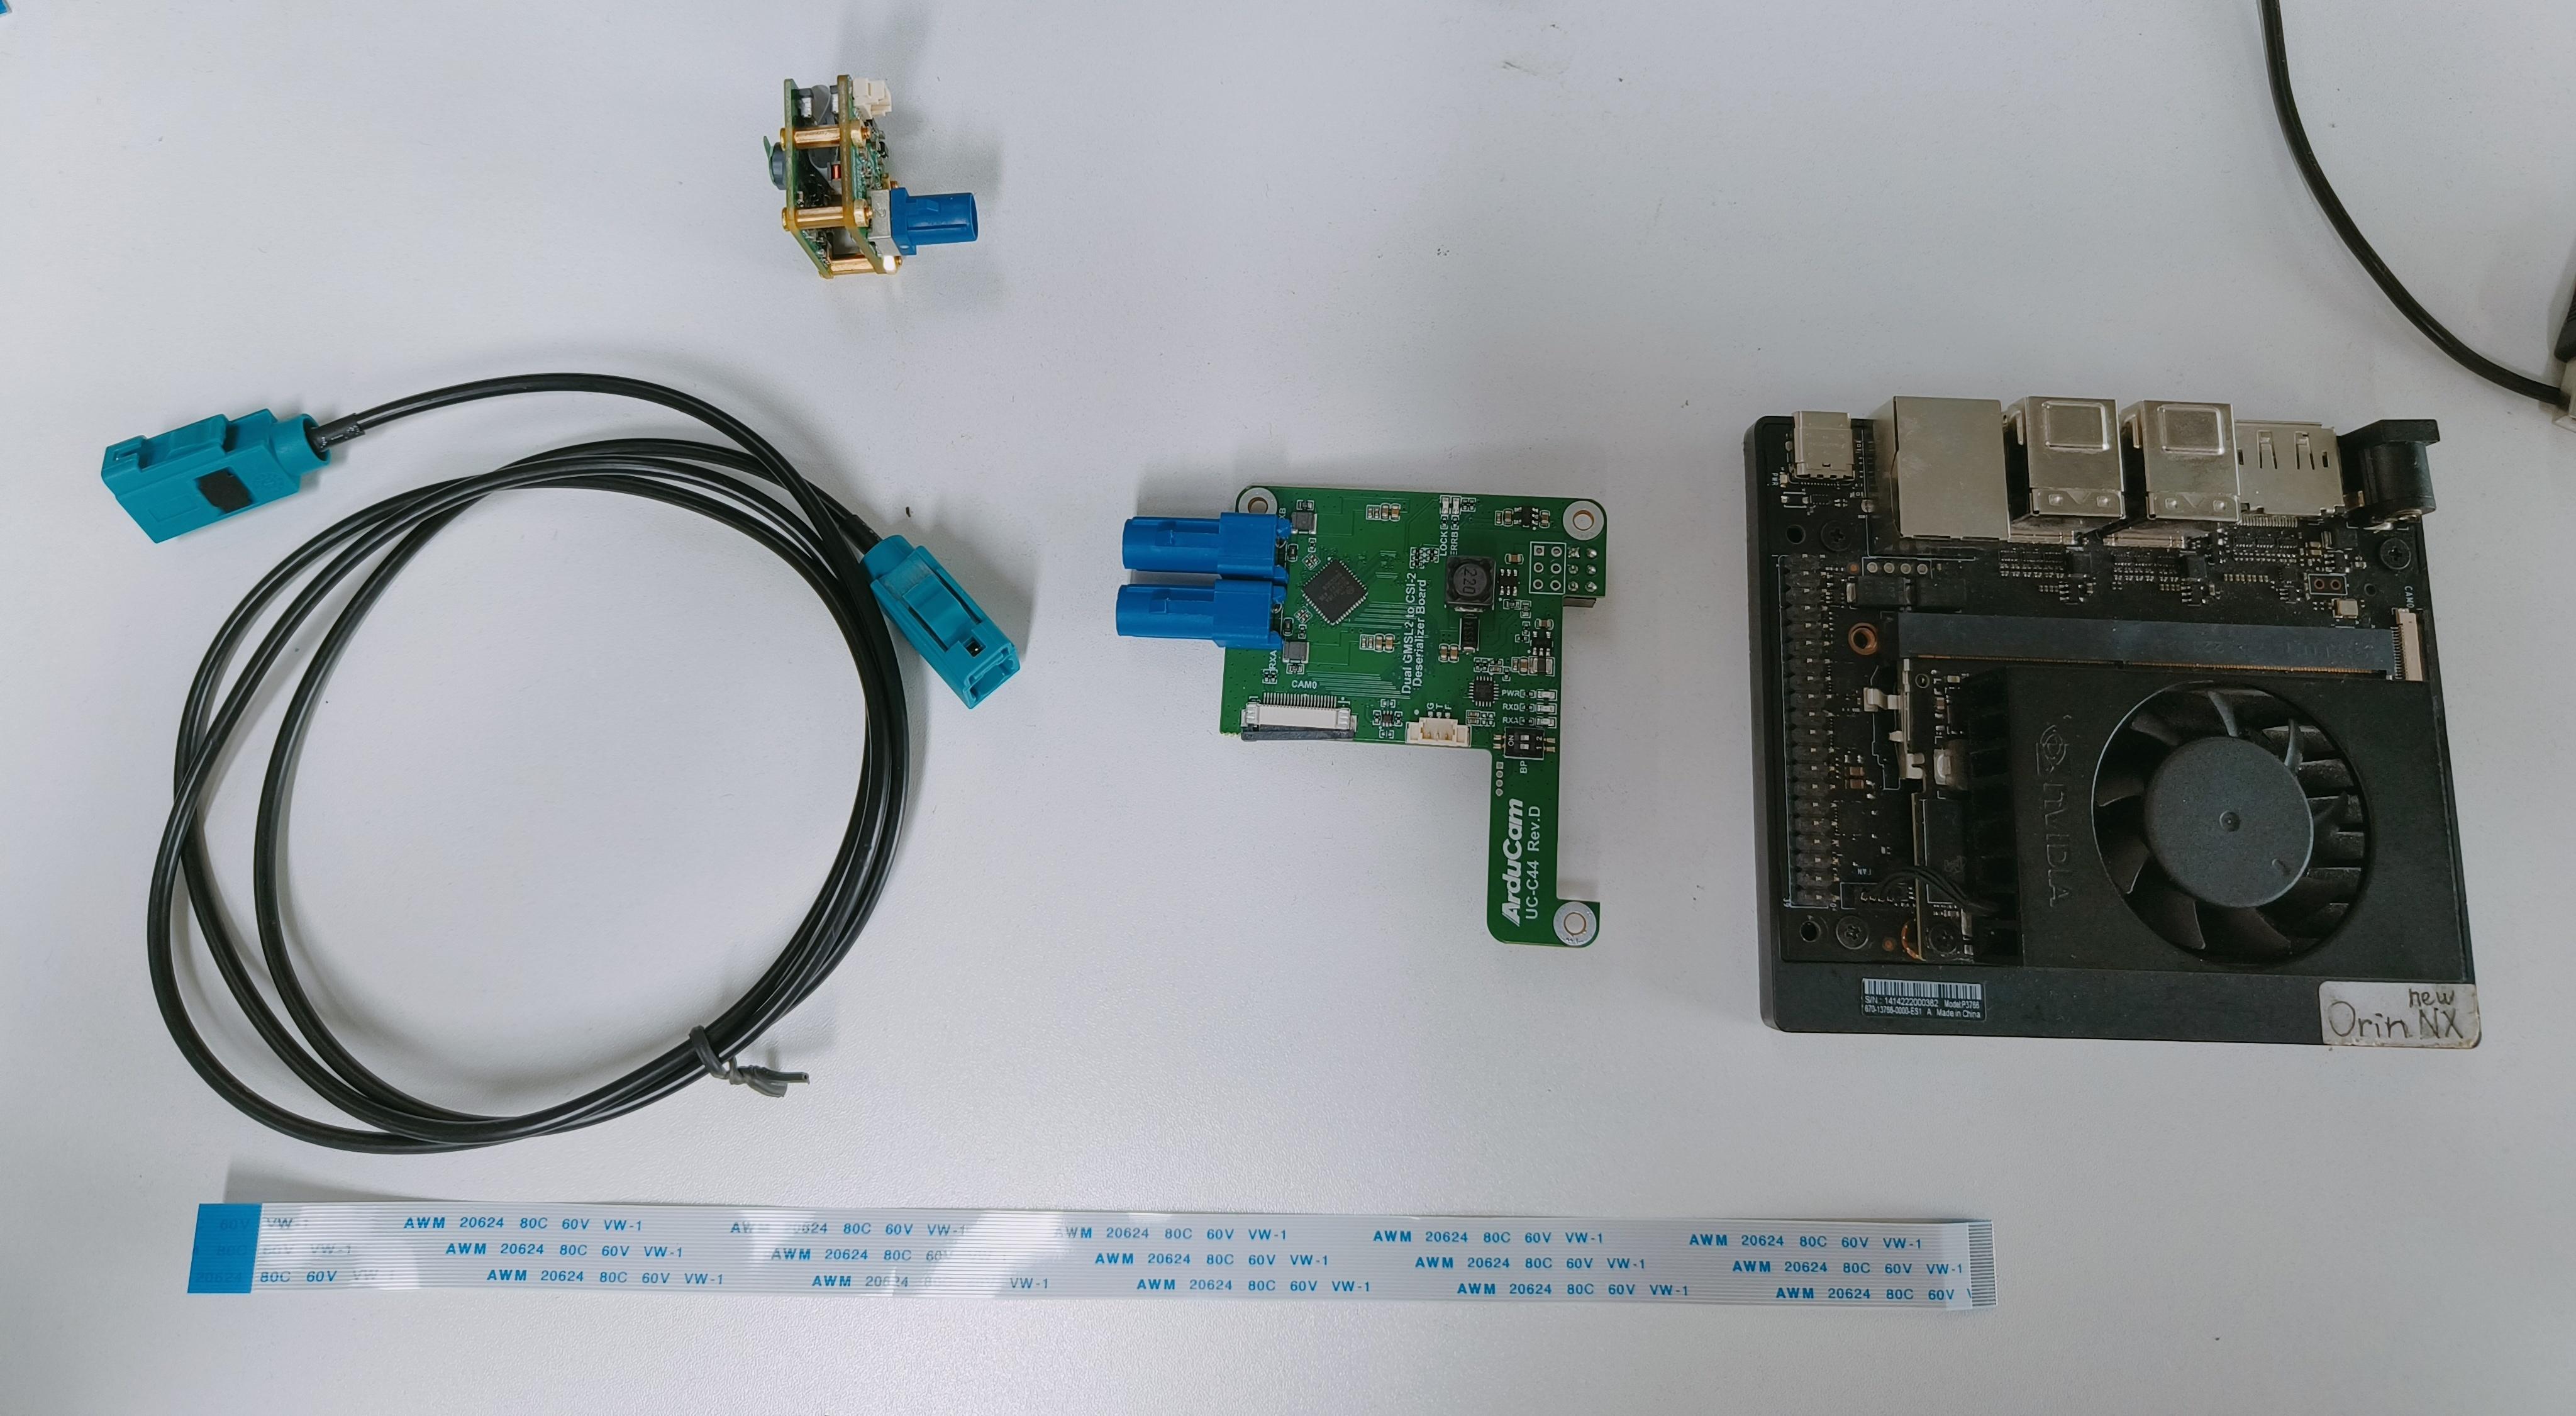
- 2*Arducam AR0234 camera
- 22-22pin opposite-side flex ribbon cable
- FAKRA Jack to FAKRA Jack coaxial cable
- 2*Arducam Serializer Board
- Arducam GMSL Deserializer Board
- NVIDIA Jetson Orin NX/Nano
Test environment:
Tested JetPack version: L4T version: 36.4.3, Jetpack 6.2
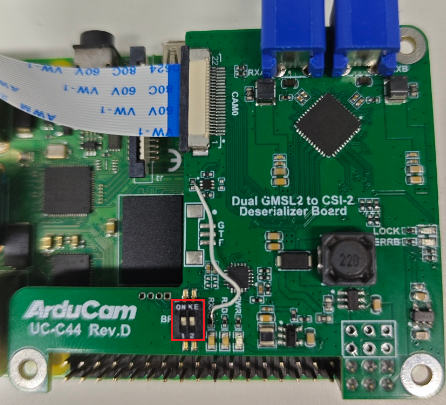
Hardware Setting
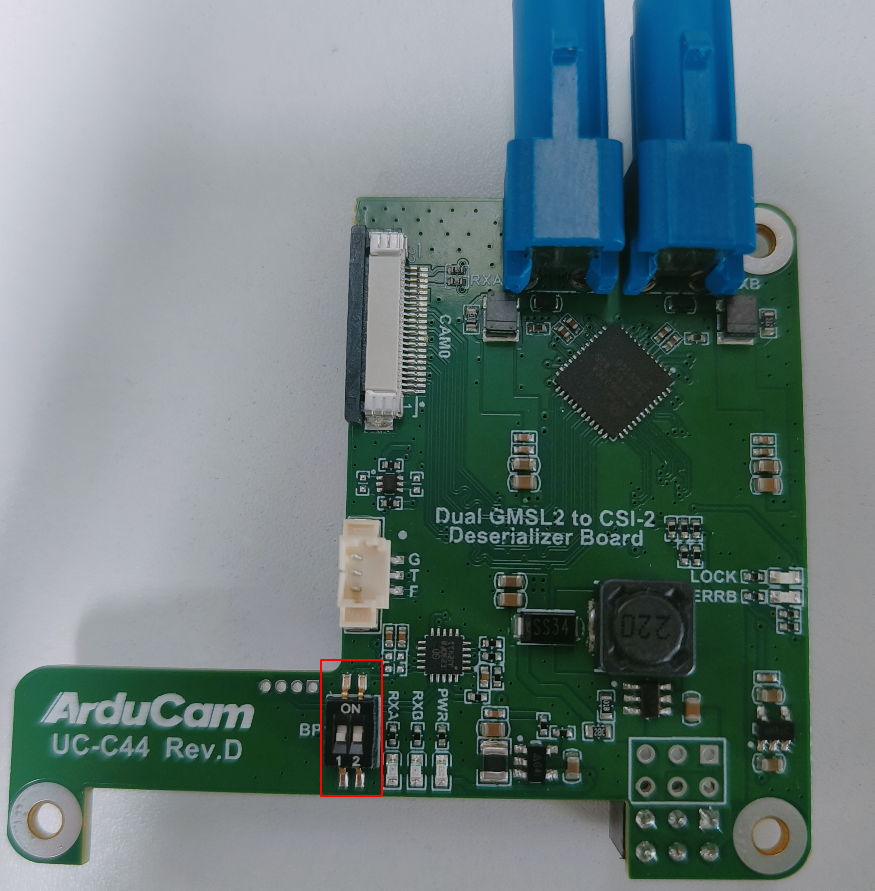
Make sure the both DIP switches to the ON position. (The default setting is off)
Hardware Connection
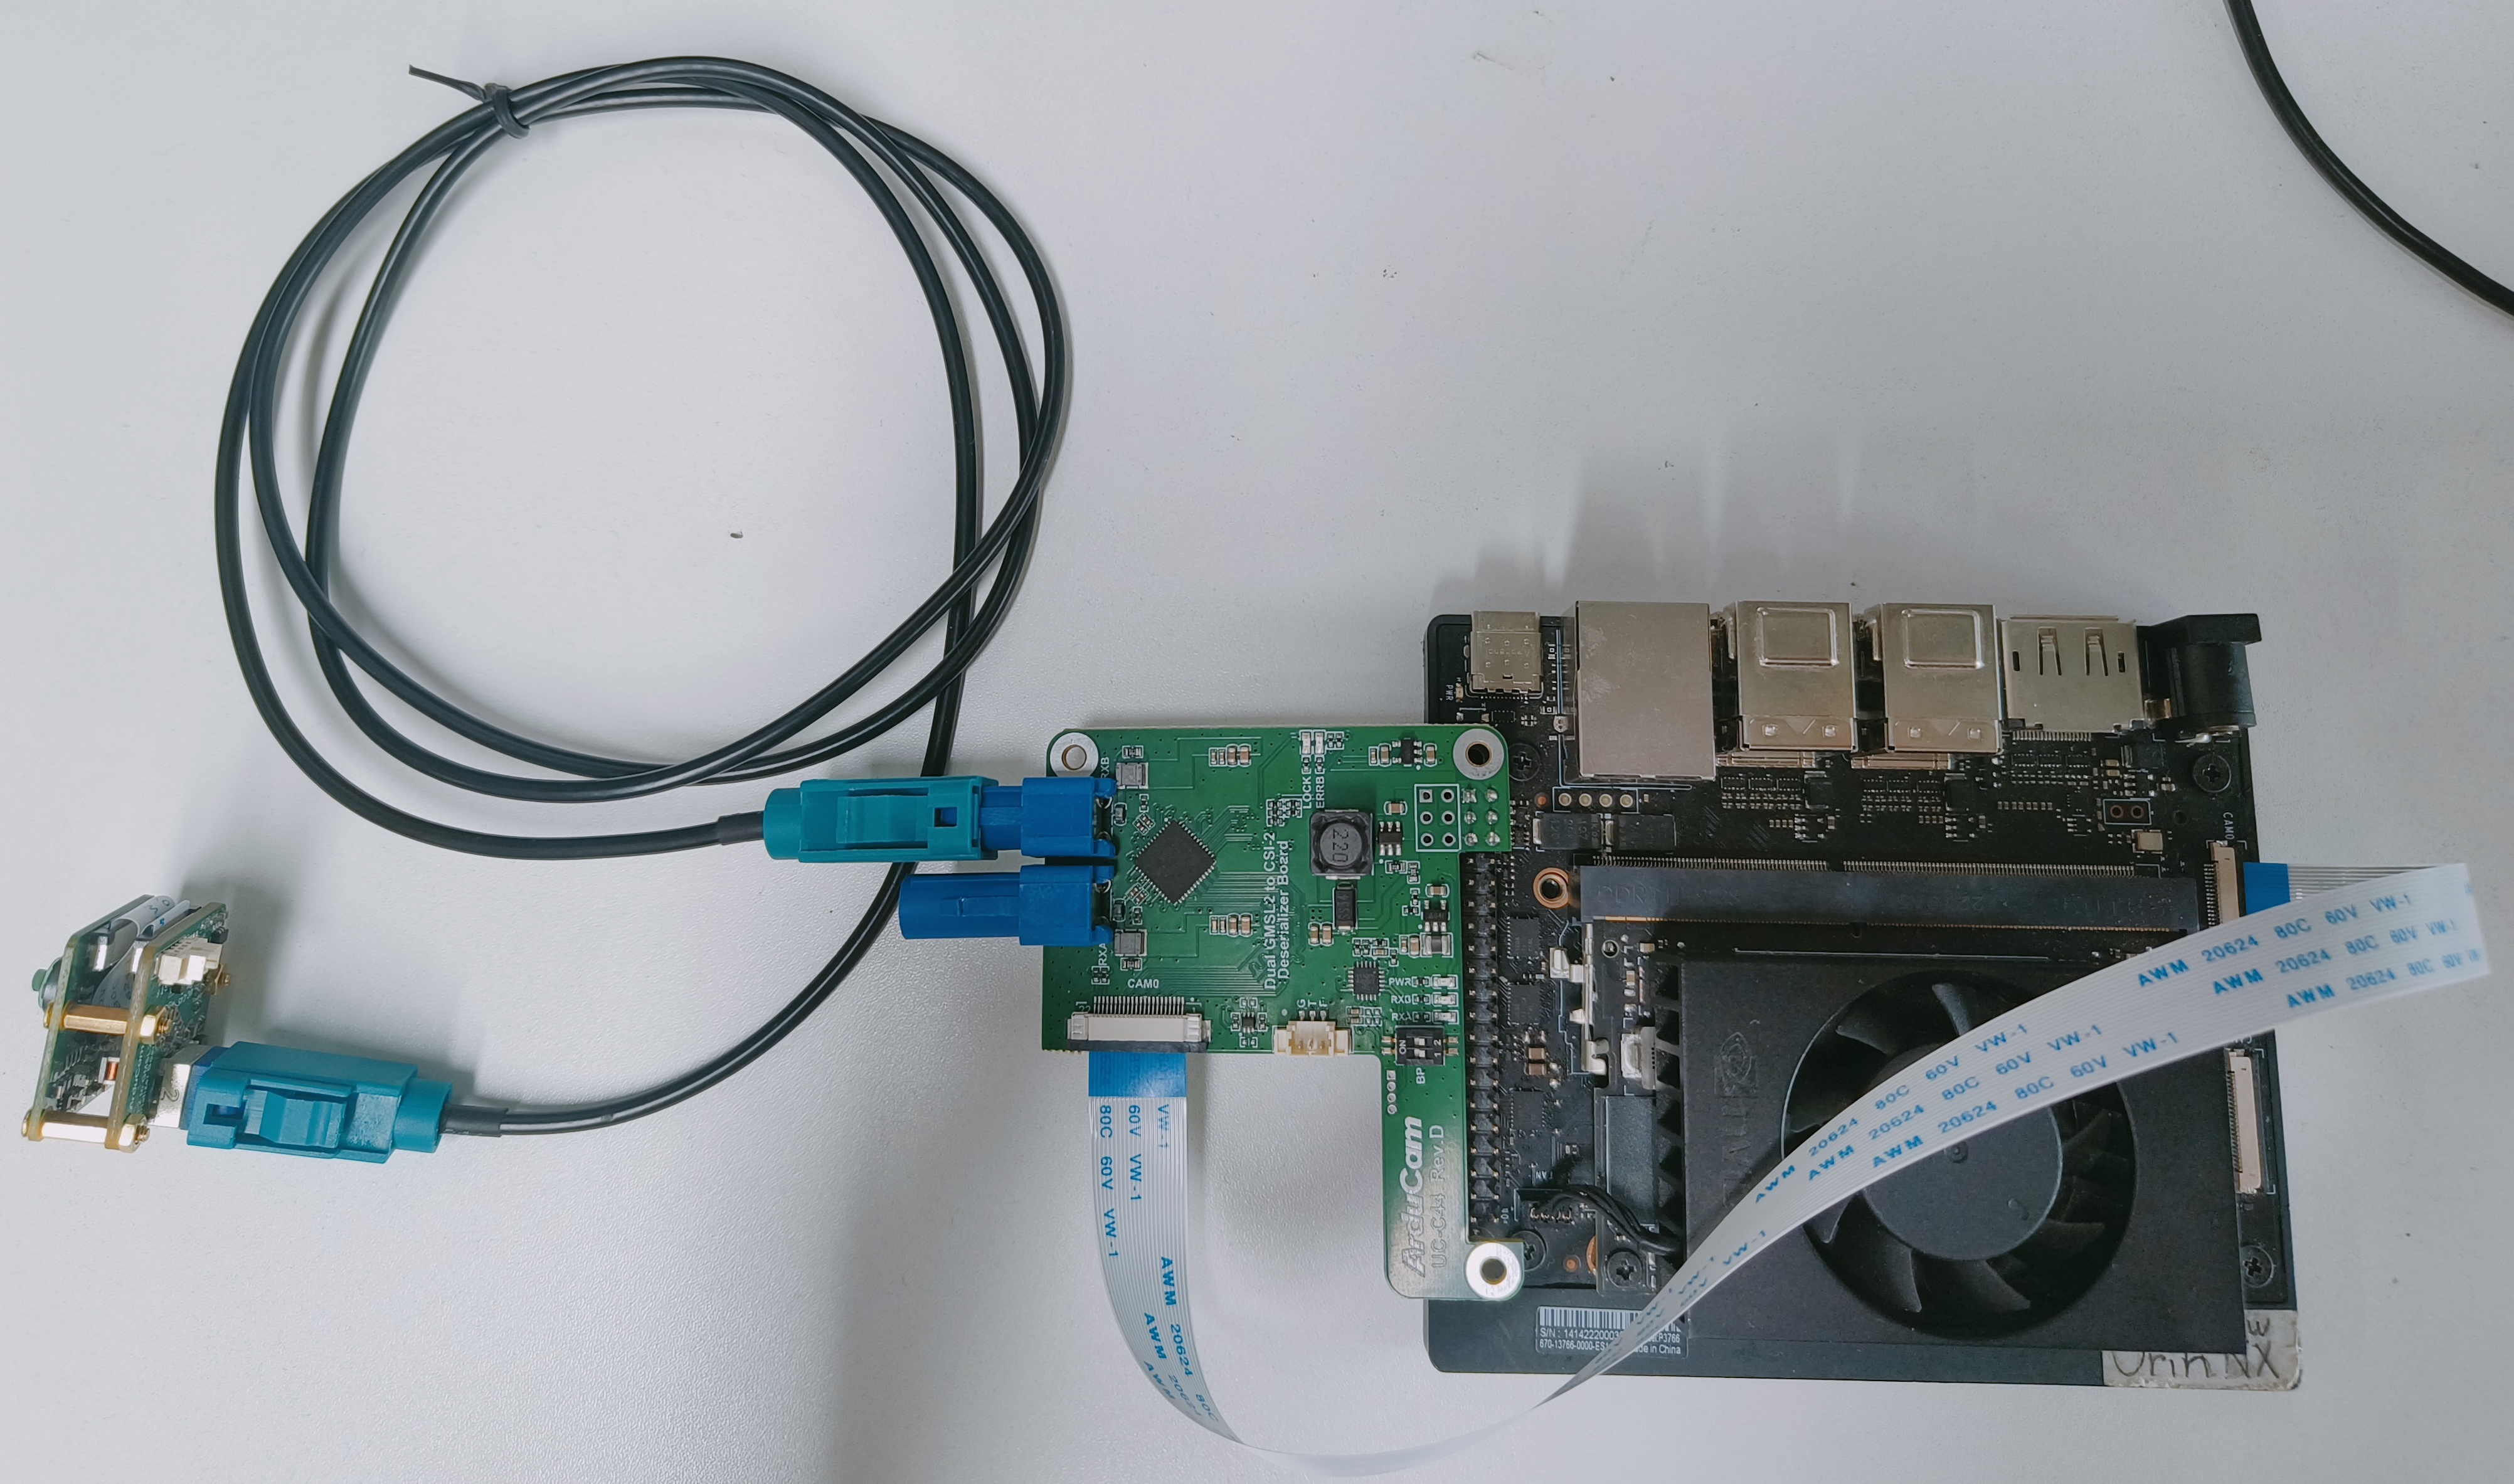
Connect the GMSL camera Kit and NVIDIA Jetson Orin NX/Nano using a 22-22pin opposite-side flex cable:
Tip
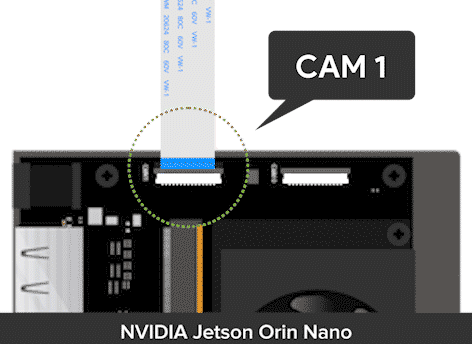
NVIDIA Jetson Orin NX connects to CAM0, NVIDIA Jetson Orin Nano connects to CAM1
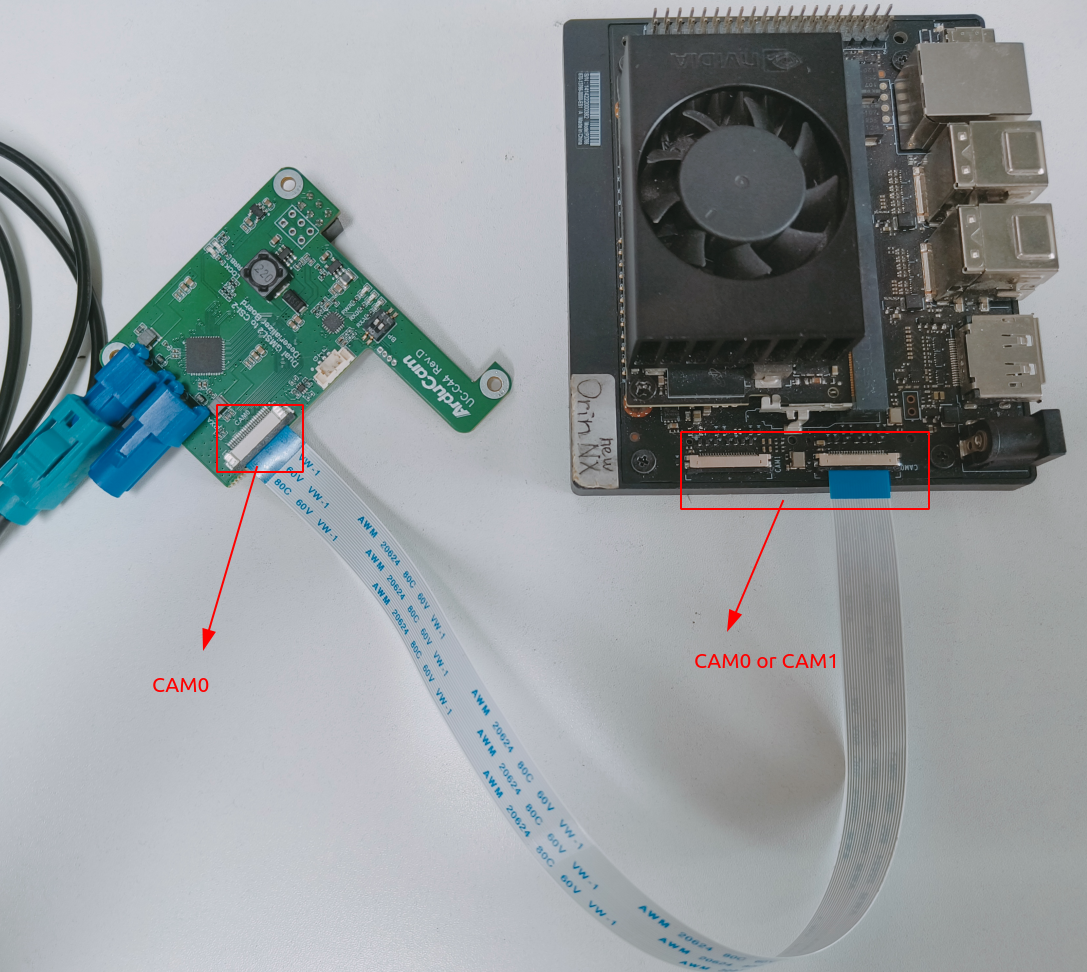
NVIDIA Jetson Orin NX -
CAM0

NVIDIA Jetson Orin Nano -
CAM1
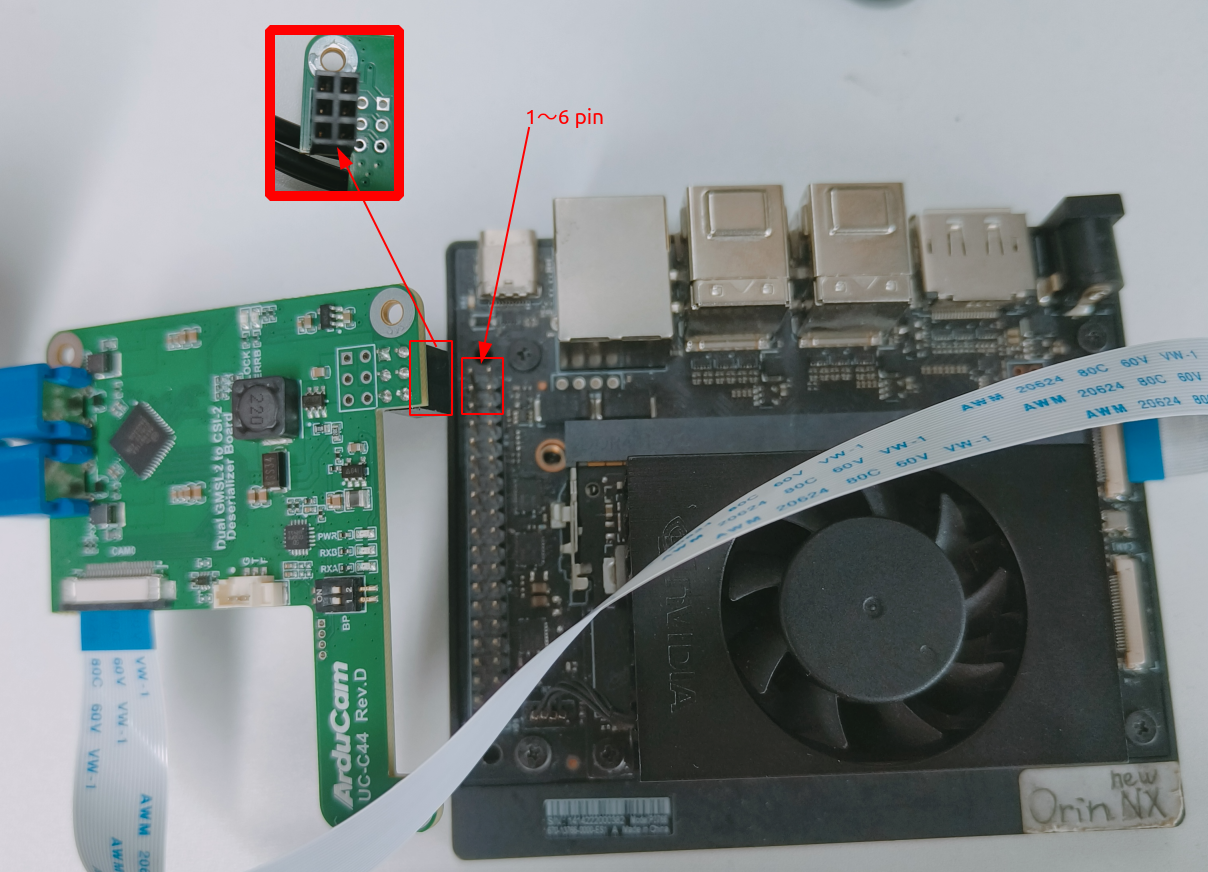
Insert the corresponding GPIO interface into 1 to 6 pins on NVIDIA Jetson:
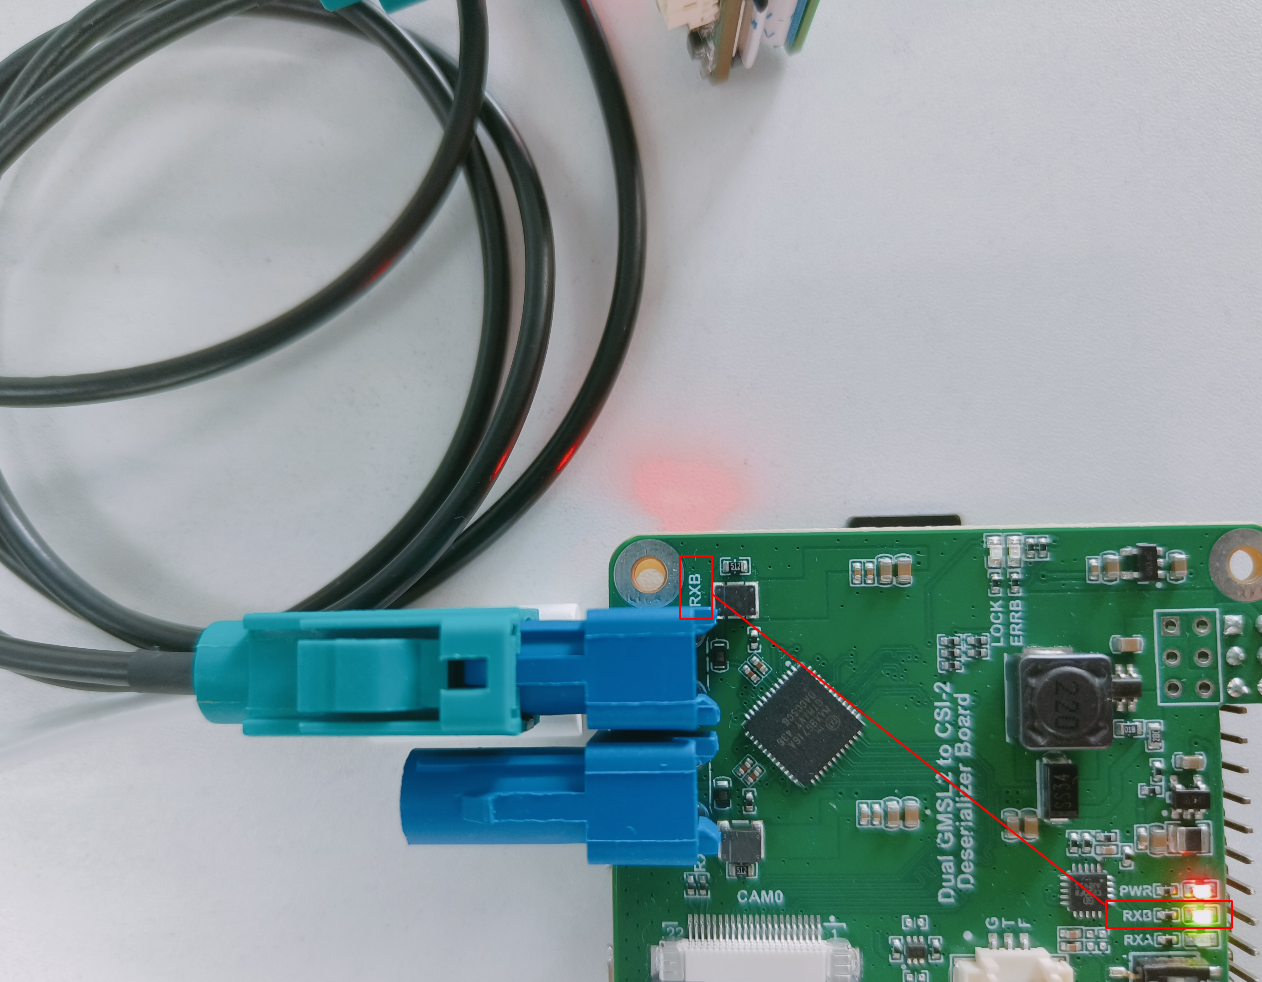
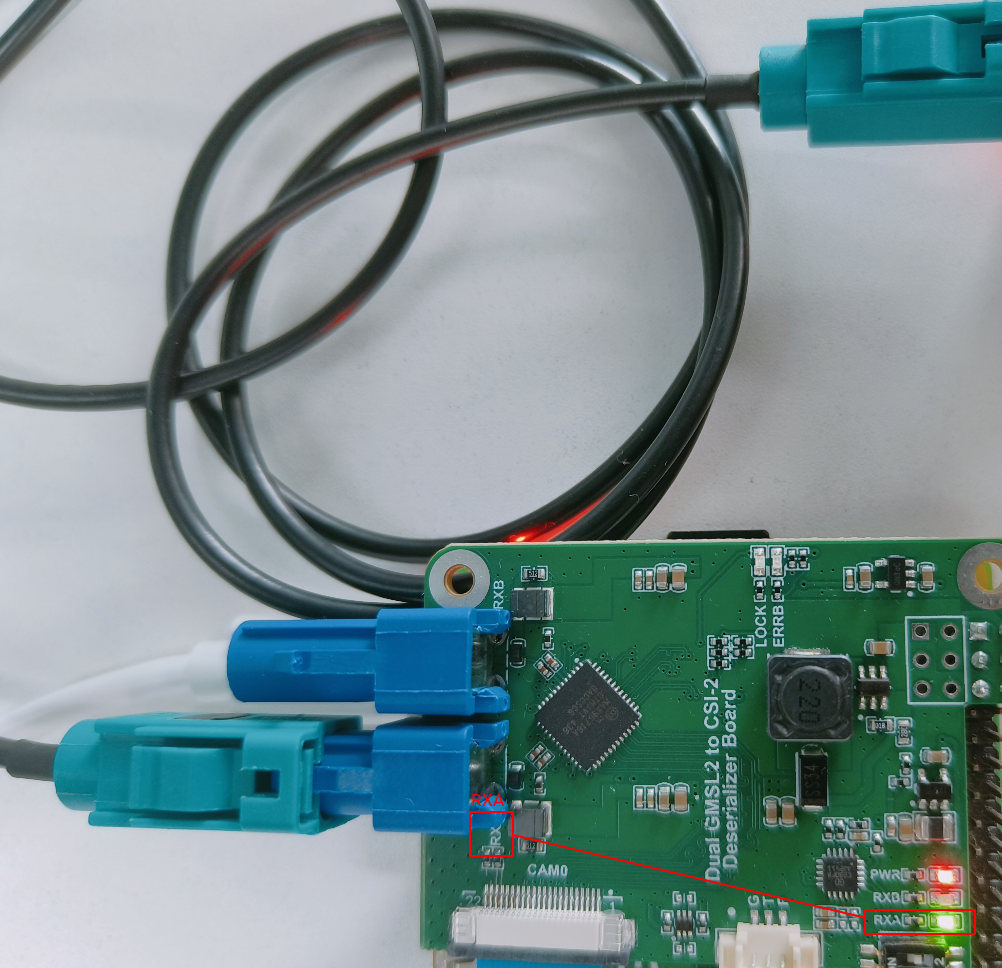
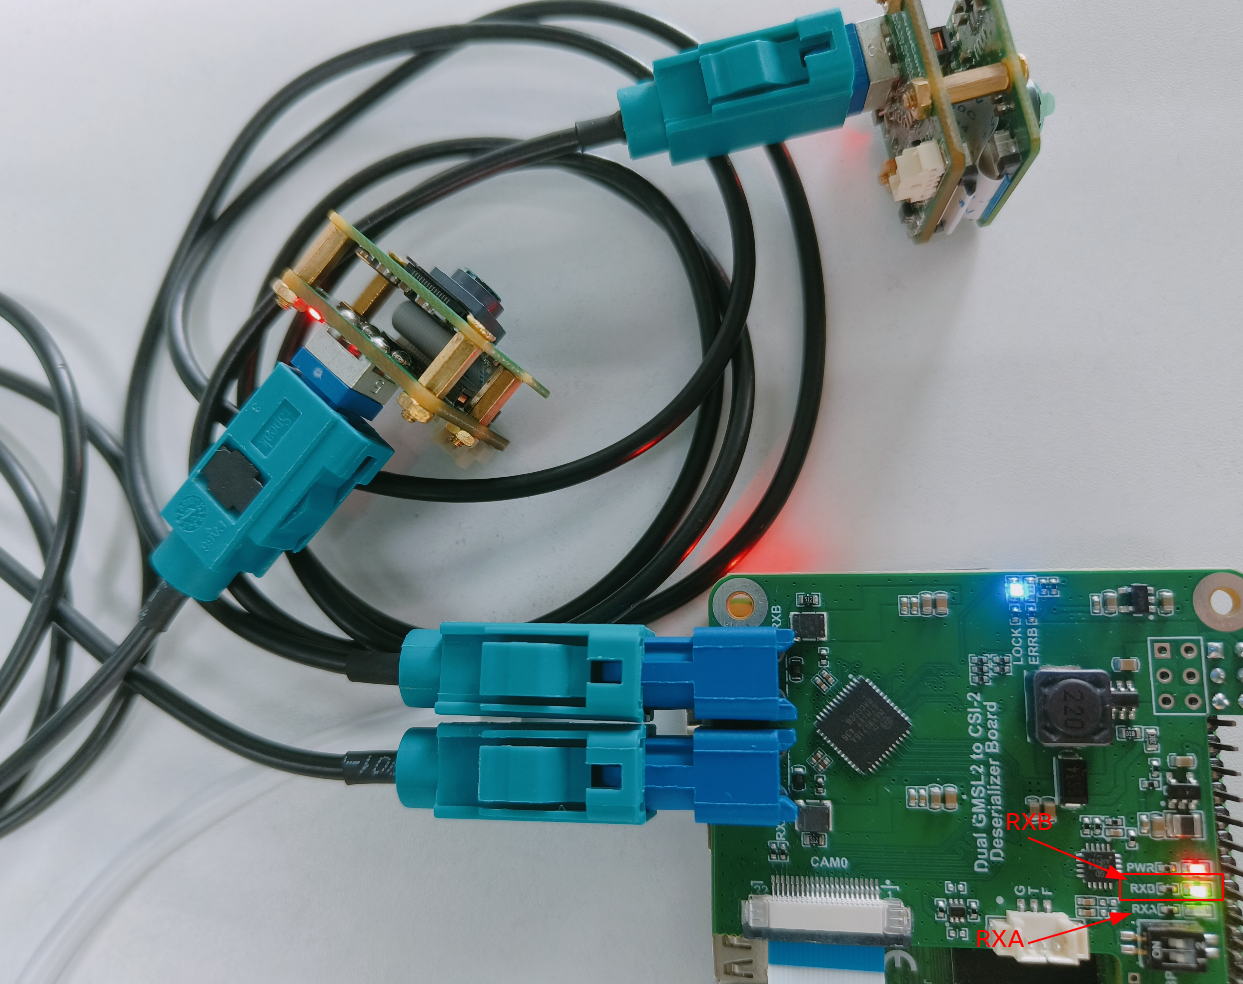
Connect the AR0234 GMSL camera Kit to the GMSL deserializer board using the FAKRA coaxial cable,The GMSL deserializer board has two interfaces, RXA and RXB.
No camera Connected:

Camera connected to RXB:
Camera connected to RXA:
Software
Install driver
note
Only supports NVIDIA JetPack6.2/L4T36.4.3 and later versions
Step 1. Download the bash scripts
cd ~ && wget https://github.com/ArduCAM/MIPI_Camera/releases/download/v0.0.3/install_full.sh
Step 2. Install the driver
chmod +x install_full.sh
./install_full.sh -m arducam_4lane
When the following prompt pops up, press
yand pressEnterto reboot the device

Step 3. Install
v4l2
sudo apt-get install v4l-utils
Step 4. Install openCV
sudo apt install nvidia-opencv-dev
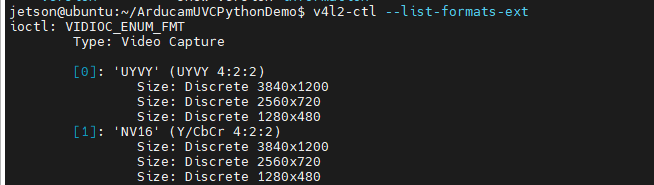
Step 4. Check Resolution
v4l2-ctl --list-formats-ext
Run the camera
Download Demo
git clone https://github.com/ArduCAM/ArducamUVCPythonDemo.git
When two cameras are connected at the same time, RXA and RXB can be switched dynamically.
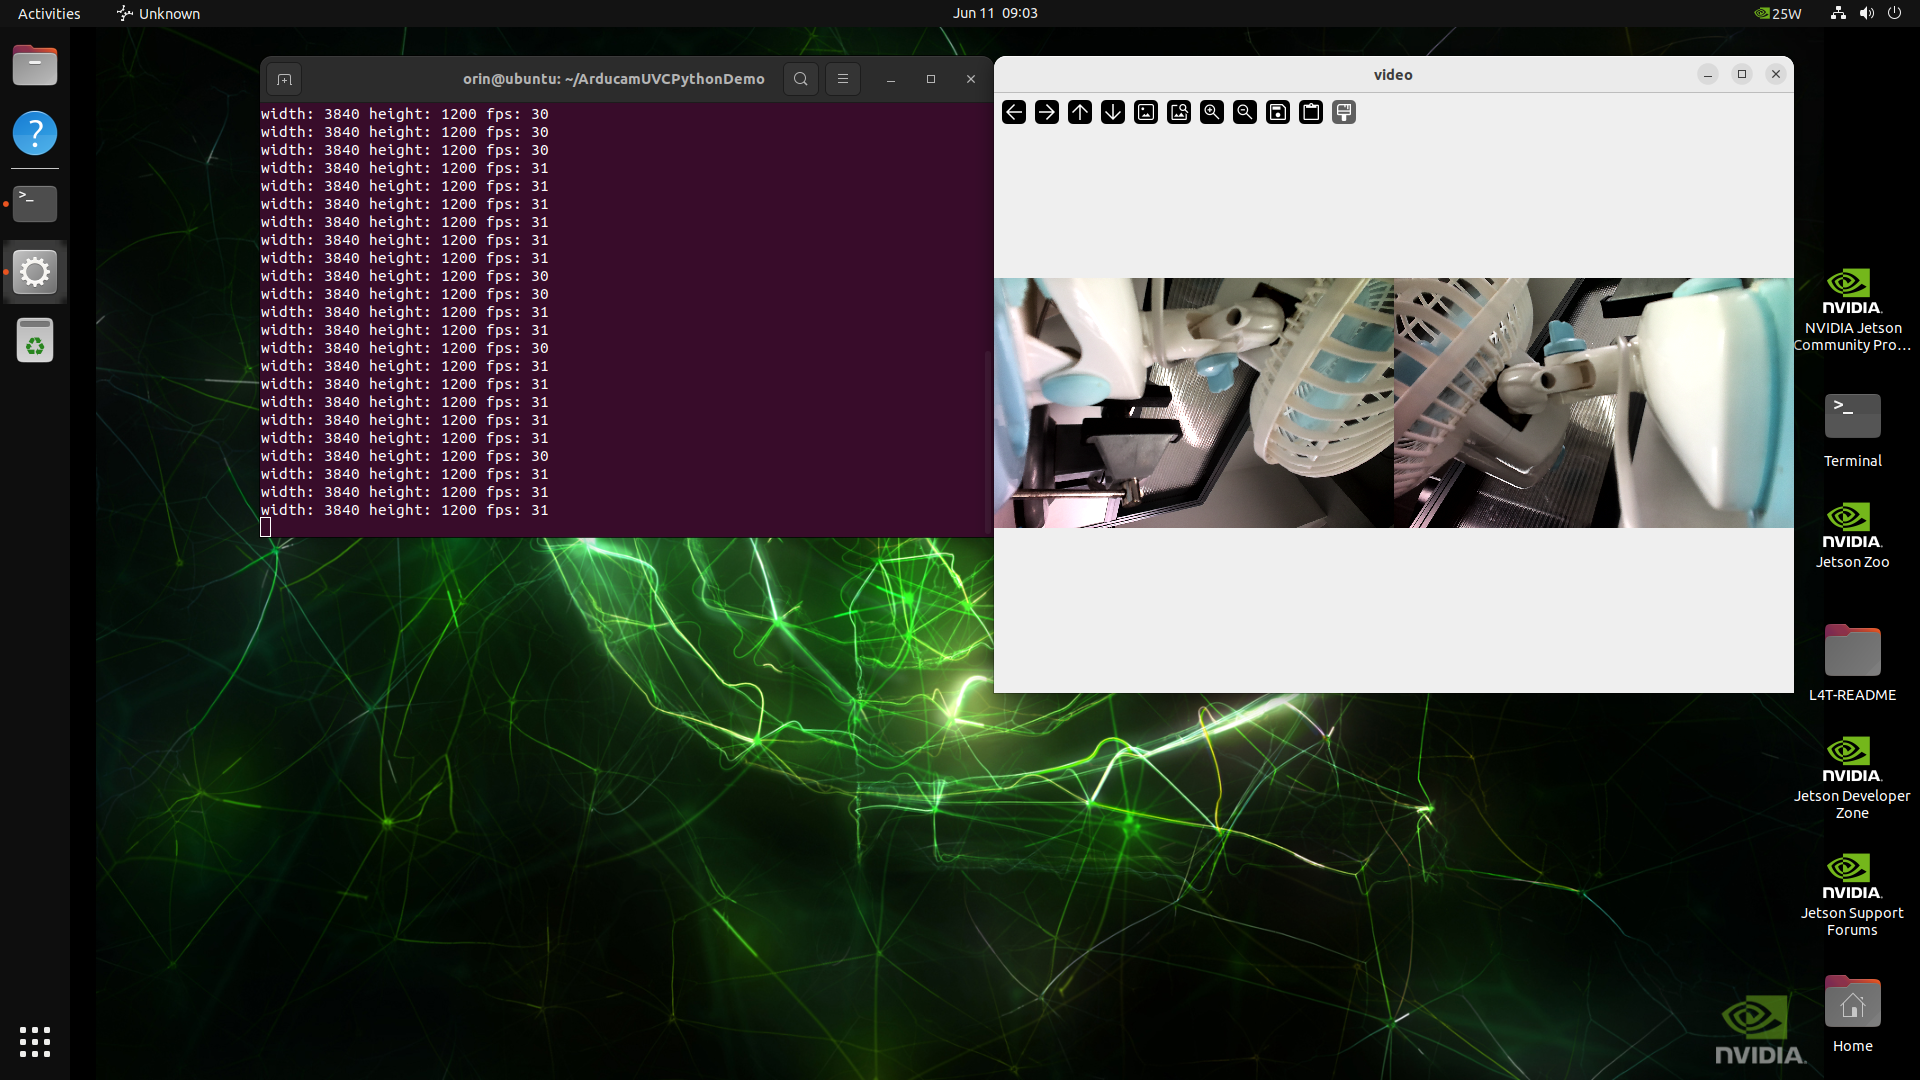
Run the demo
The default resolution is 3840x1200
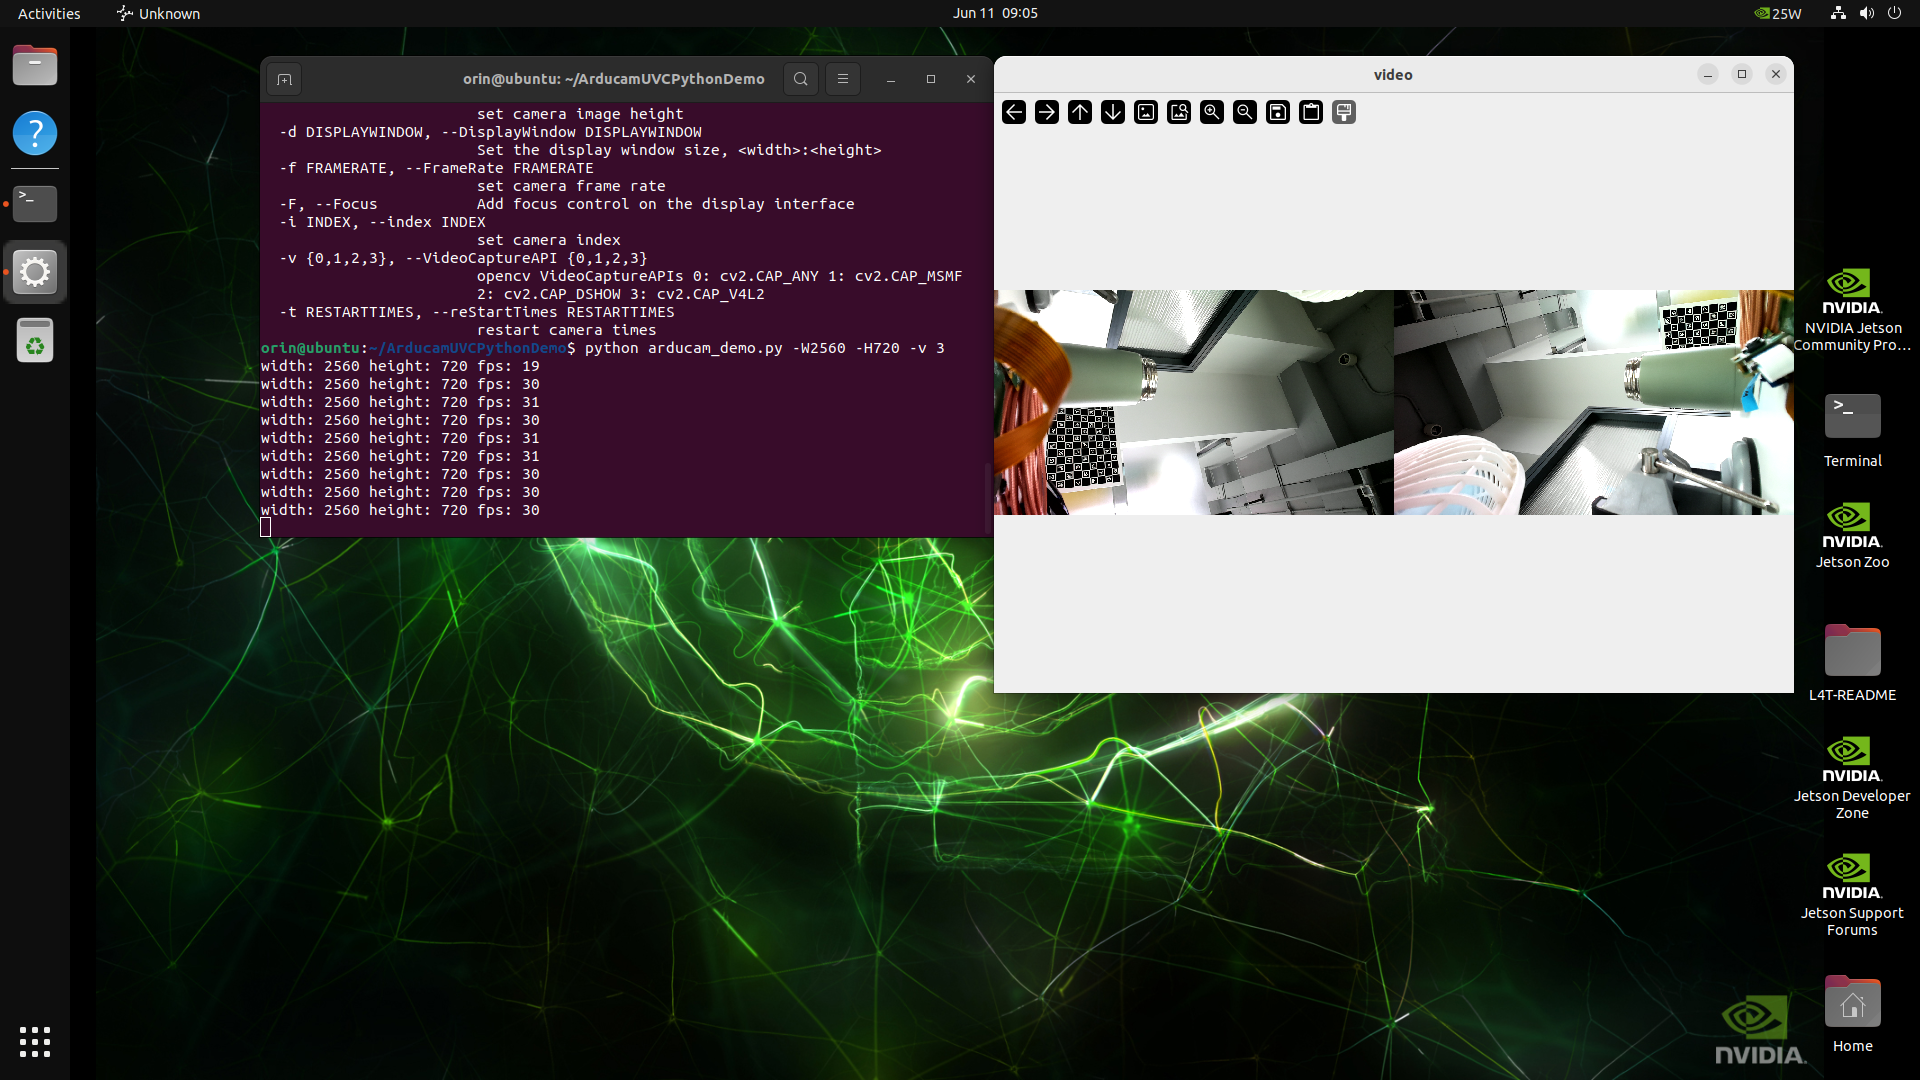
cd ~/ArducamUVCPythonDemo && python3 arducam_demo.py -v 3
Switch Resolution to 2560x720
python3 arducam_demo.py -W 2560 -H 720 -v 3
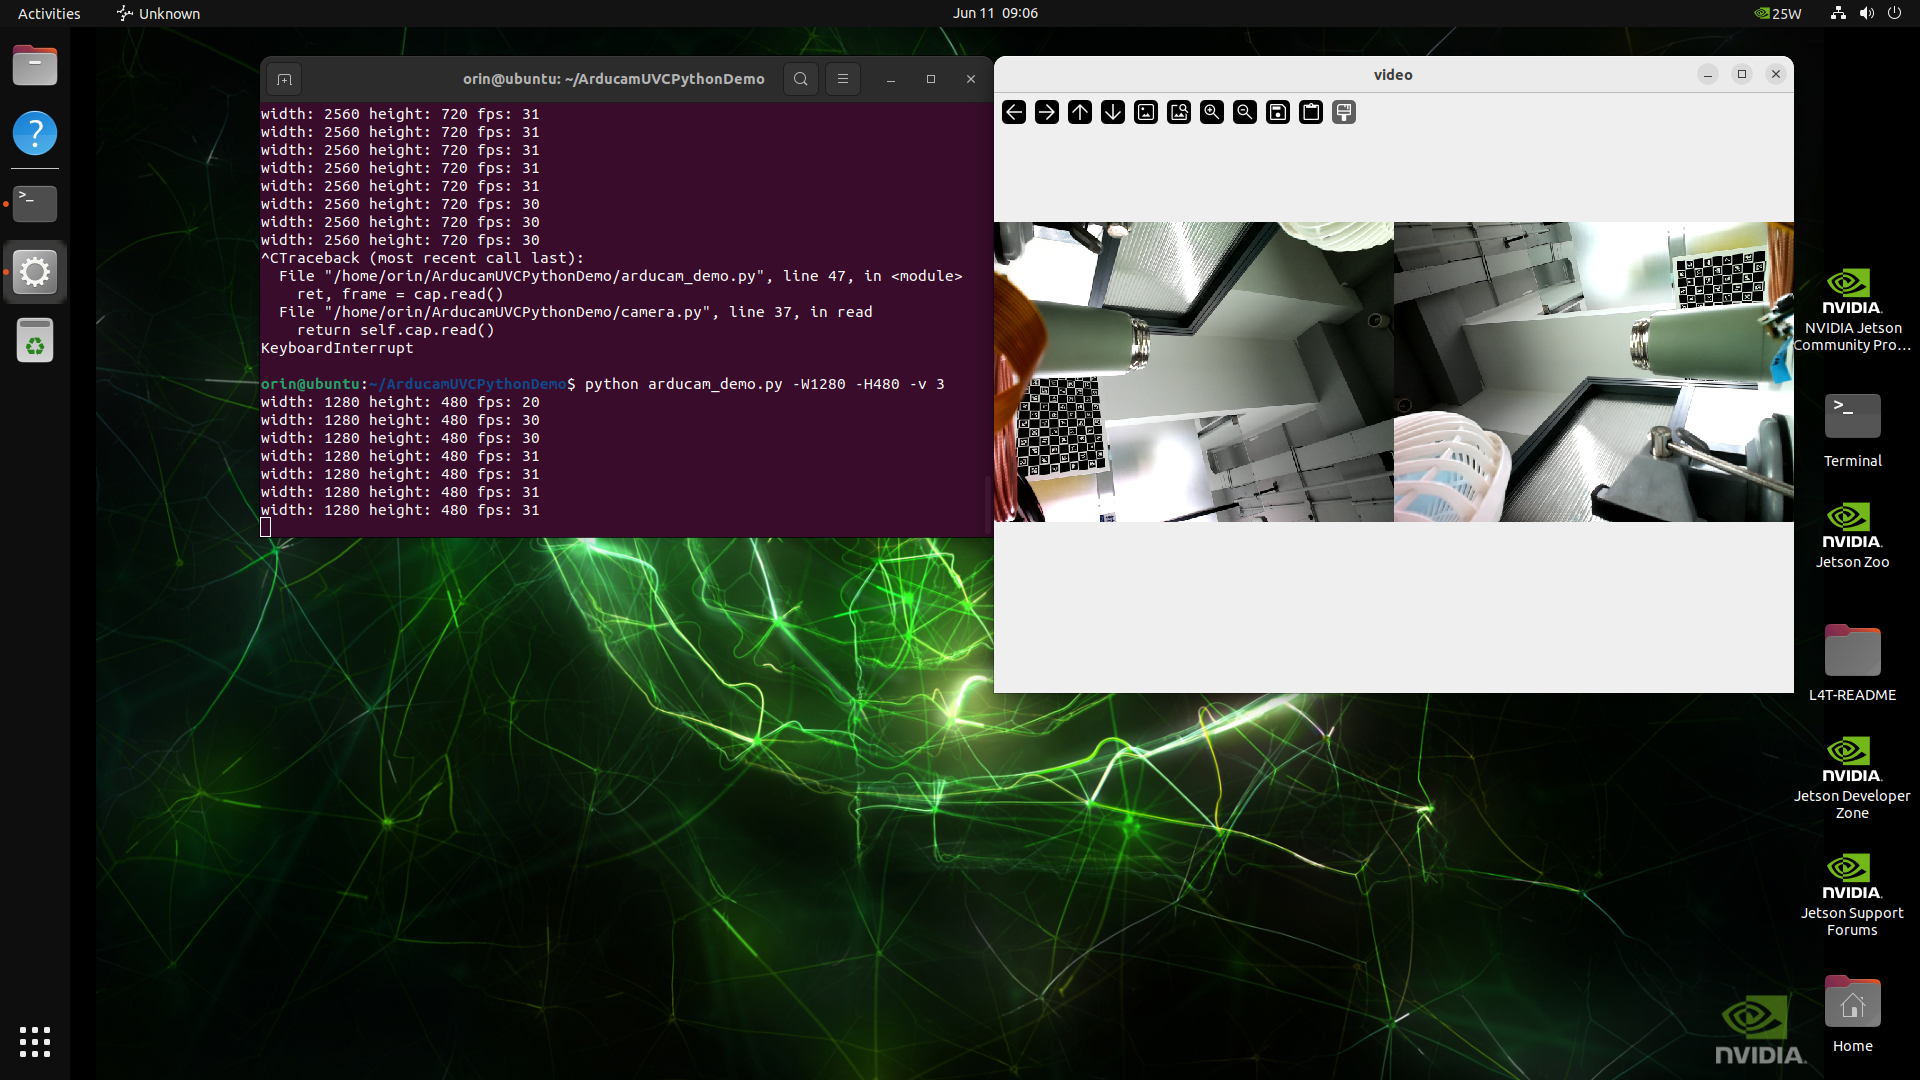
Switch Resolution to 1280x480
python3 arducam_demo.py -W 1280 -H 480 -v 3
Save the Image
Open the preview interface and press the s key to save the image, and the q key to exit the screen interface
Quick Start Guide-IMX219 GMSL Camera Extension Kit
Hardware
Hardware Preparation
- Arducam imx219 GMSL camera
- 22-22pin opposite-side flex ribbon cable
- FAKRA Jack to FAKRA Jack coaxial cable
- Arducam Serializer Board
- Arducam GMSL Deserializer Board
- NVIDIA Jetson Orin NX/Nano
Hardware Setting
Make sure the both DIP switches to the OFF position. (The default setting is off)
Hardware Connection
Connect the GMSL camera Kit and NVIDIA Jetson Orin NX/Nano using a 22-22pin opposite-side flex cable:
Insert the corresponding GPIO interface into 1 to 6 pins on NVIDIA Jetson:
Connect the imx219 GMSL camera to the GMSL deserializer board using the FAKRA coaxial cable,The GMSL deserializer board has two interfaces, RXA and RXB.
When connecting a camera, the GMSL deserializer board will automatically identify whether it is connected to RXA or RXB.
No camera Connected:
Camera connected to RXB:
Camera connected to RXA:
Note
When two cameras are connected at the same time, the camera with the RXB interface will be selected by default. The host will only recognize one camera, which is the default RXB camera.
Connection Diagram
Software
Install driver
note
Only supports NVIDIA JetPack6.2/L4T36.4.3 and later versions
Step 1. Download the bash scripts
cd ~ && wget https://github.com/ArduCAM/MIPI_Camera/releases/download/v0.0.3/install_full.sh
Step 2. Install the driver
chmod +x install_full.sh
./install_full.sh -m imx219_gmsl
Step 3. Check whether the camera is detected
ls /dev/video*
Step 4. Install v4l2
sudo apt-get install v4l-utils
Use the v4l2-ctl --list-formats-ext command to check the resolution, frame rate, and image format of Arducam imx219 GMSL camera kit.
Run the camera
Preview
gst-launch-1.0 nvarguscamerasrc sensor_id=0 ! "video/x-raw(memory:NVMM),width=1920,height=1080,framerate=30/1,format=NV12" ! nvvidconv flip-method=0 ! "video/x-raw,width=960,height=720" ! nvvidconv ! nvegltransform ! nveglglessink -e
When two cameras are connected at the same time, RXA and RXB can be switched dynamically.
Switch to RXA
sudo i2ctransfer -f -y 9 w3@0x0c 0xff 0x55 0x01
Switch to RXB
sudo i2ctransfer -f -y 9 w3@0x0c 0xff 0x55 0x02
Tip
Support hot-plug (at least one camera must be connected when Jetson Orin Nano/NX powered on)
"Hot-plug" means that after NVIDIA Jetson Orin Nano/NX recognizes the camera, it can freely switch between the camera and
RXA,RXBinterfaces when the camera is not running.