Getting started: Arducam ToF Camera for Jetson
A quick guide for getting started with Arducam ToF Camera on Jetson Nano/Xavier NX.
Introduction
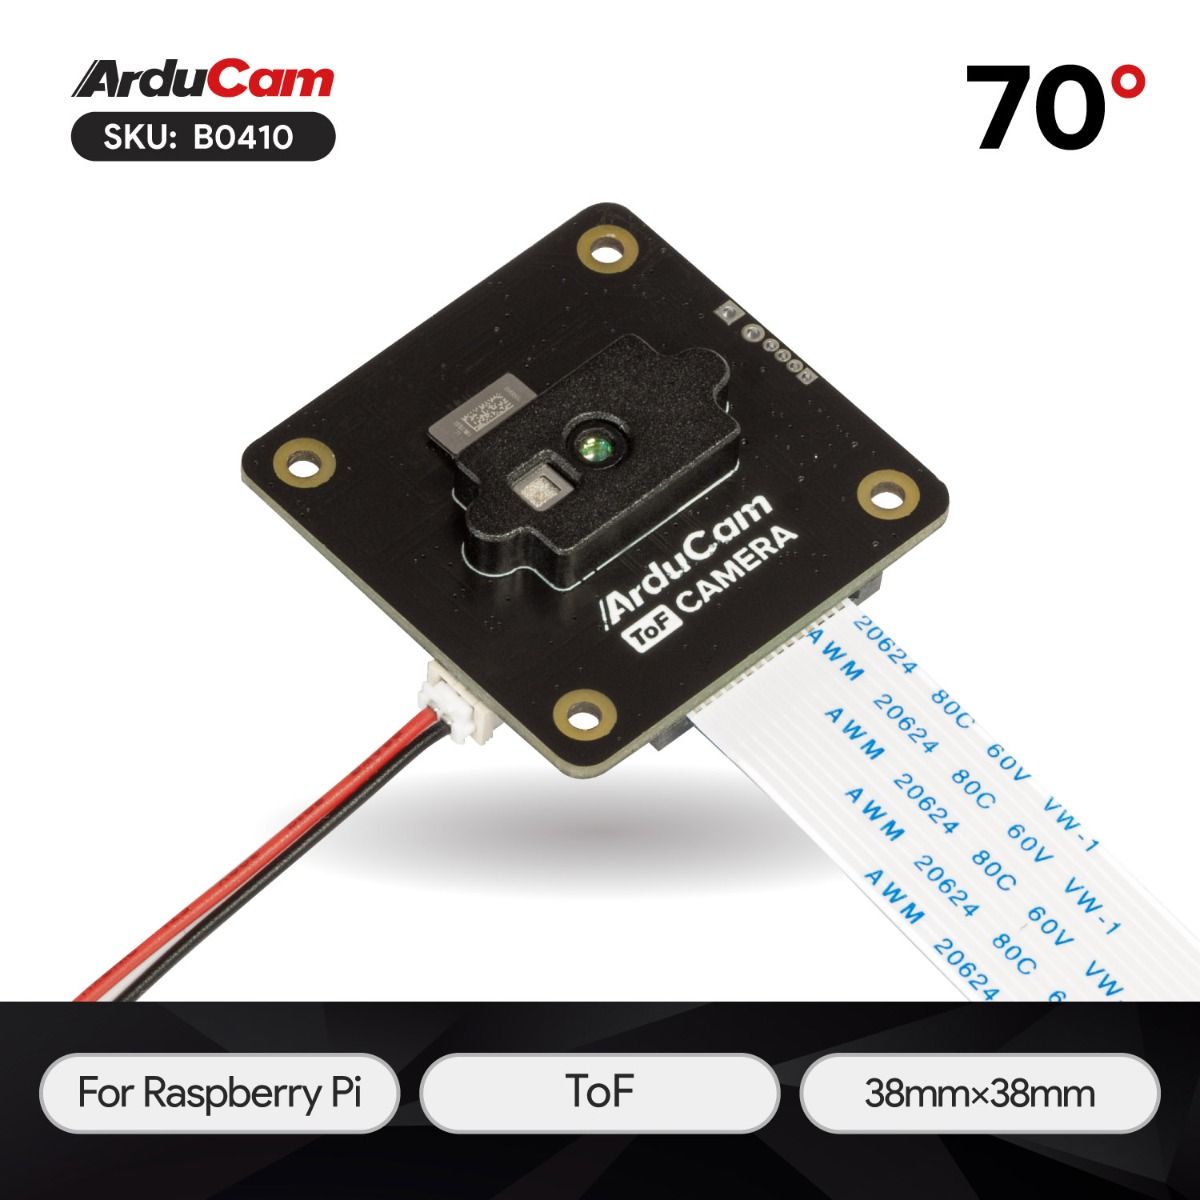
A Time of Flight camera module featuring a MIPI-CSI 2 connection and offering up to 4-meter measuring range with sub-2cm precision, designed and optimized exclusively for Raspberry Pi & Nvidia Jetson boards.
Specifications
| Specification | Arducam ToF Camera |
|---|---|
| Price | $29.99 – Kickstarter $50 – MSRP |
| Number of Effective Pixels | 240×180 |
| Image Size | 1/6″ |
| Max. Frame Rate (Sensor) | 120fps |
| Max. Depth Frame Rate (Raspberry Pi) | 30fps, 4-phase |
| Raspberry Pi OS | Bullseye (32-bit/64-bit) 01/28/22 or later releases |
| TDP | 3.5W Power supply for Pi should be at least 5V/4A |
| Supported Platforms | Pi 2/3/CM3/4B Zero W/Zero 2 W/CM4 |
| Modulation Frequency | 75MHz/37.5MHz |
| Viewing Angle | 70° Diagonal |
| Measurement Distance | Far Mode: 4m Near Mode: 2m |
| Light Source | 940nm VCSEL illuminator |
| Board Size | 38mm x 38mm |
| Interface | MIPI (2-Lane) |
| Output Formats | 4-phases RAW Frame, Depth Frame, Grayscale Amplitude Frame |
Product
| Product Image | SKU | Pin/Connect Type | Color Type | Features | Light Source | Field of View(HxV) | Focus Type | IR Sensitivity |
|---|---|---|---|---|---|---|---|---|
 |
B0410 | 15/Top | Color | Real-time point cloud and depth map | 940nm VCSEL illuminator | 62.8°(H) x 37.9°(V) | Fixed Focus | without IR-cut filter |
How ToF Works
ToF stands for “Time of Flight”.
A ToF Camera emits modulated lights (CW method) and uses the time it takes for the said lights to be reflected back to measure the distance/depth info of any given object/scene, and you can obtain depth data (X, Y & Z coordinate position) in every pixel.
Light travel is calculated with d=C/2f, where C is the speed of light and f is the modulation frequency.
Note
Make sure you are running a newer version of Jetpack (4.6.1 or later). A fresh install is highly recommended.
Hardware Connection
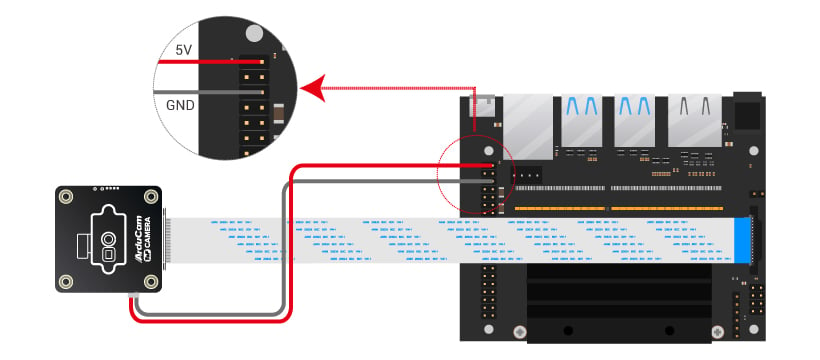
For NVIDIA Jetson Nano/Xavier NX
For a more detailed graphic guide on how to connect, please check here.
For NVIDIA Orin Nano/Orin NX
- Locate the camera connector (CSI). It’s on the side of the carrier board, opposite to the GPIO pins.
- Pull up on the plastic edges of the camera port. Do it gently to avoid pulling it off.
- Push in the camera ribbon. Make sure the contacts are facing the heatsinks. Do not bend the flex cable, and make sure it’s firmly inserted into the bottom of the connector.
- Push the plastic connector down. Do it while holding the flex cable until the connector is back in place.
Diagram - NVIDIA Jetson Orin Nano
15pin-22pin FPC Cable
22pin-22pin FFC Cable
Diagram - NVIDIA Jetson Orin NX
15pin-22pin FPC Cable
22pin-22pin FFC Cable
Access the Camera
Follow each of the steps by running their respective command shown below.
Step 1. Pull the repository.
git clone https://github.com/ArduCAM/Arducam_tof_camera.git
Step 2. Change the directory to Arducam_tof_camera
cd Arducam_tof_camera
Step 3. *Installation (Driver, Dependencies, SDK, OpenCV)*
./Install_dependencies_jetson.sh
When you see the reboot prompt, enter y.
Step 4. Compile
./compile.sh
Once it’s successfully compiled, you can refer to the link below to run the demo programs.
- :fontawesome-brands-github:{ .github } - Quick start
Instructions for Safe Use
To properly use the Arudcam ToF Camera, kindly note:
- Before connecting, you should always power the Jetson Nano/Xavier NX off and remove the power supply first.
- Make sure the cable on the camera board is locked in place.
- Make sure the cable is correctly inserted in the Jetson Nano/Xavier NX board’s MIPI CSI-2 connector.
- Avoid high temperatures.
- Avoid water, moisture, or conductive surfaces while in operation.
- Avoid folding, or straining the flex cable.
- Avoid cross-threading with tripods.
- Gently push/pull the connector to avoid damaging the printed circuit board.
- Avoid moving or handling the printed circuit board excessively while it’s in operation.
- Handle by the edges to avoid damage from electrostatic discharge.
- Where the camera board is stored should be cool and as dry as possible.
- Sudden temperature/humidity changes can cause dampness in the lens and affect the image/video quality.


