64MP OwlSight

Introduction
Arducam has released the highly influential and industry benchmark Arducam 64MP Hawkeye autofocus embedded camera for Raspberry Pi platform in 2022. Since the product was released, it has been widely praised. However, the camera, which is completely based on Arducam's independent research and development, cannot be natively supported by the Raspberry Pi platform. Users need to download the corresponding driver installation package to drive and use the camera.
Now, Arducam is coming with the latest Arducam 64MP OwlSight OV64A40 autofocus camera module. The biggest feature of the new 64MP OV64A40 OwlSight camera is that it will be fully supported by the mainstream software: libcamera apps.
In addition, we have created a complete ecosystem for it, with accessories, products, and solutions available, which will greatly save you the energy and time spent in developing and implementing projects. We also support a deeper freedom in customization. You can share any of your ideas with us, and we will use our expertise and services to help you realize any project.
Key Features
- Native Libcamera Support: Directly compatible with Raspberry Pi's mainstream
libcamerasoftware, eliminating the need for custom driver installation. - Ultra-High Resolution: Captures stunningly clear images with a maximum resolution of 9248 × 6944 (64MP).
- Excellent Photosensitive Performance: Utilizes a large 1/1.32″ optical format and class-leading pixel size for superior light gathering.
- High Frame Rates: Achieves high frame rates even at high resolutions.
- Dual Mode Focus: Supports both CDAF (Contrast Detection Autofocus) and software-controlled manual focus.
- Rich Ecosystem: A full range of accessories and solutions are available to accelerate project implementation.
Specifications
Image Sensor
| Parameter | Specification |
|---|---|
| Image Sensor | OV64A40 |
| Still Resolution | 64 Megapixels |
| Color Filter Type | Color (Quad-Bayer) |
| Shutter Type | Rolling Shutter |
| Optical Size | 1/1.32″ |
| Pixel Size | 1.008 µm × 1.008 µm |
| Sensor Active Area | 9248 (H) × 6944 (V) |
| Output Formats | JPEG / YUV / RGB / RAW10 |
| IR Sensitivity | Integral IR-cut Filter, visible light only |
Lens
| Parameter | Specification |
|---|---|
| Focus Type | Manual / Autofocus |
| Focal Length | 6.65mm |
| Aperture (F.NO) | F1.9 |
| Field of View (FOV) | 84°(D) × 68°(H) × 56°(V) |
| Default Focus Range | 12cm ~ ∞ |
Electrical & Mechanical
| Parameter | Specification |
|---|---|
| Power Requirements | 3.3V / 300mA |
| Camera Board Size | 25 × 24 mm |
Frame Rate & Resolution
The OV64A40 camera's frame rate can be adjusted by setting the MIPI link frequency. This is controlled via the link-frequency parameter within the dtoverlay line in your config.txt file.
Two link frequencies are supported:
High-Speed Mode (link-frequency=456000000)
| Resolution | Frame Rate |
|---|---|
| 9152 × 6944 | 2.6fps |
| 8000 × 6000 | 2.5fps |
| 4624 × 3472 | 10fps |
| 3840 × 2160 | 20fps |
| 2312 × 1736 | 30fps |
| 1920 × 1080 | 60fps |
Low-Speed Mode (link-frequency=360000000)
| Resolution | Frame Rate |
|---|---|
| 9152 × 6944 | 2fps |
| 8000 × 6000 | 2.5fps |
| 4624 × 3472 | 7.6fps |
| 3840 × 2160 | 14.8fps |
| 2312 × 1736 | 26.7fps |
| 1920 × 1080 | 45fps |
Product Catalog
| Product Image | SKU | Resolution | Sensor | Interface | Features | Focus Type | Focus Distance | Field of View(DxHxV) | IR Sensitivity |
|---|---|---|---|---|---|---|---|---|---|
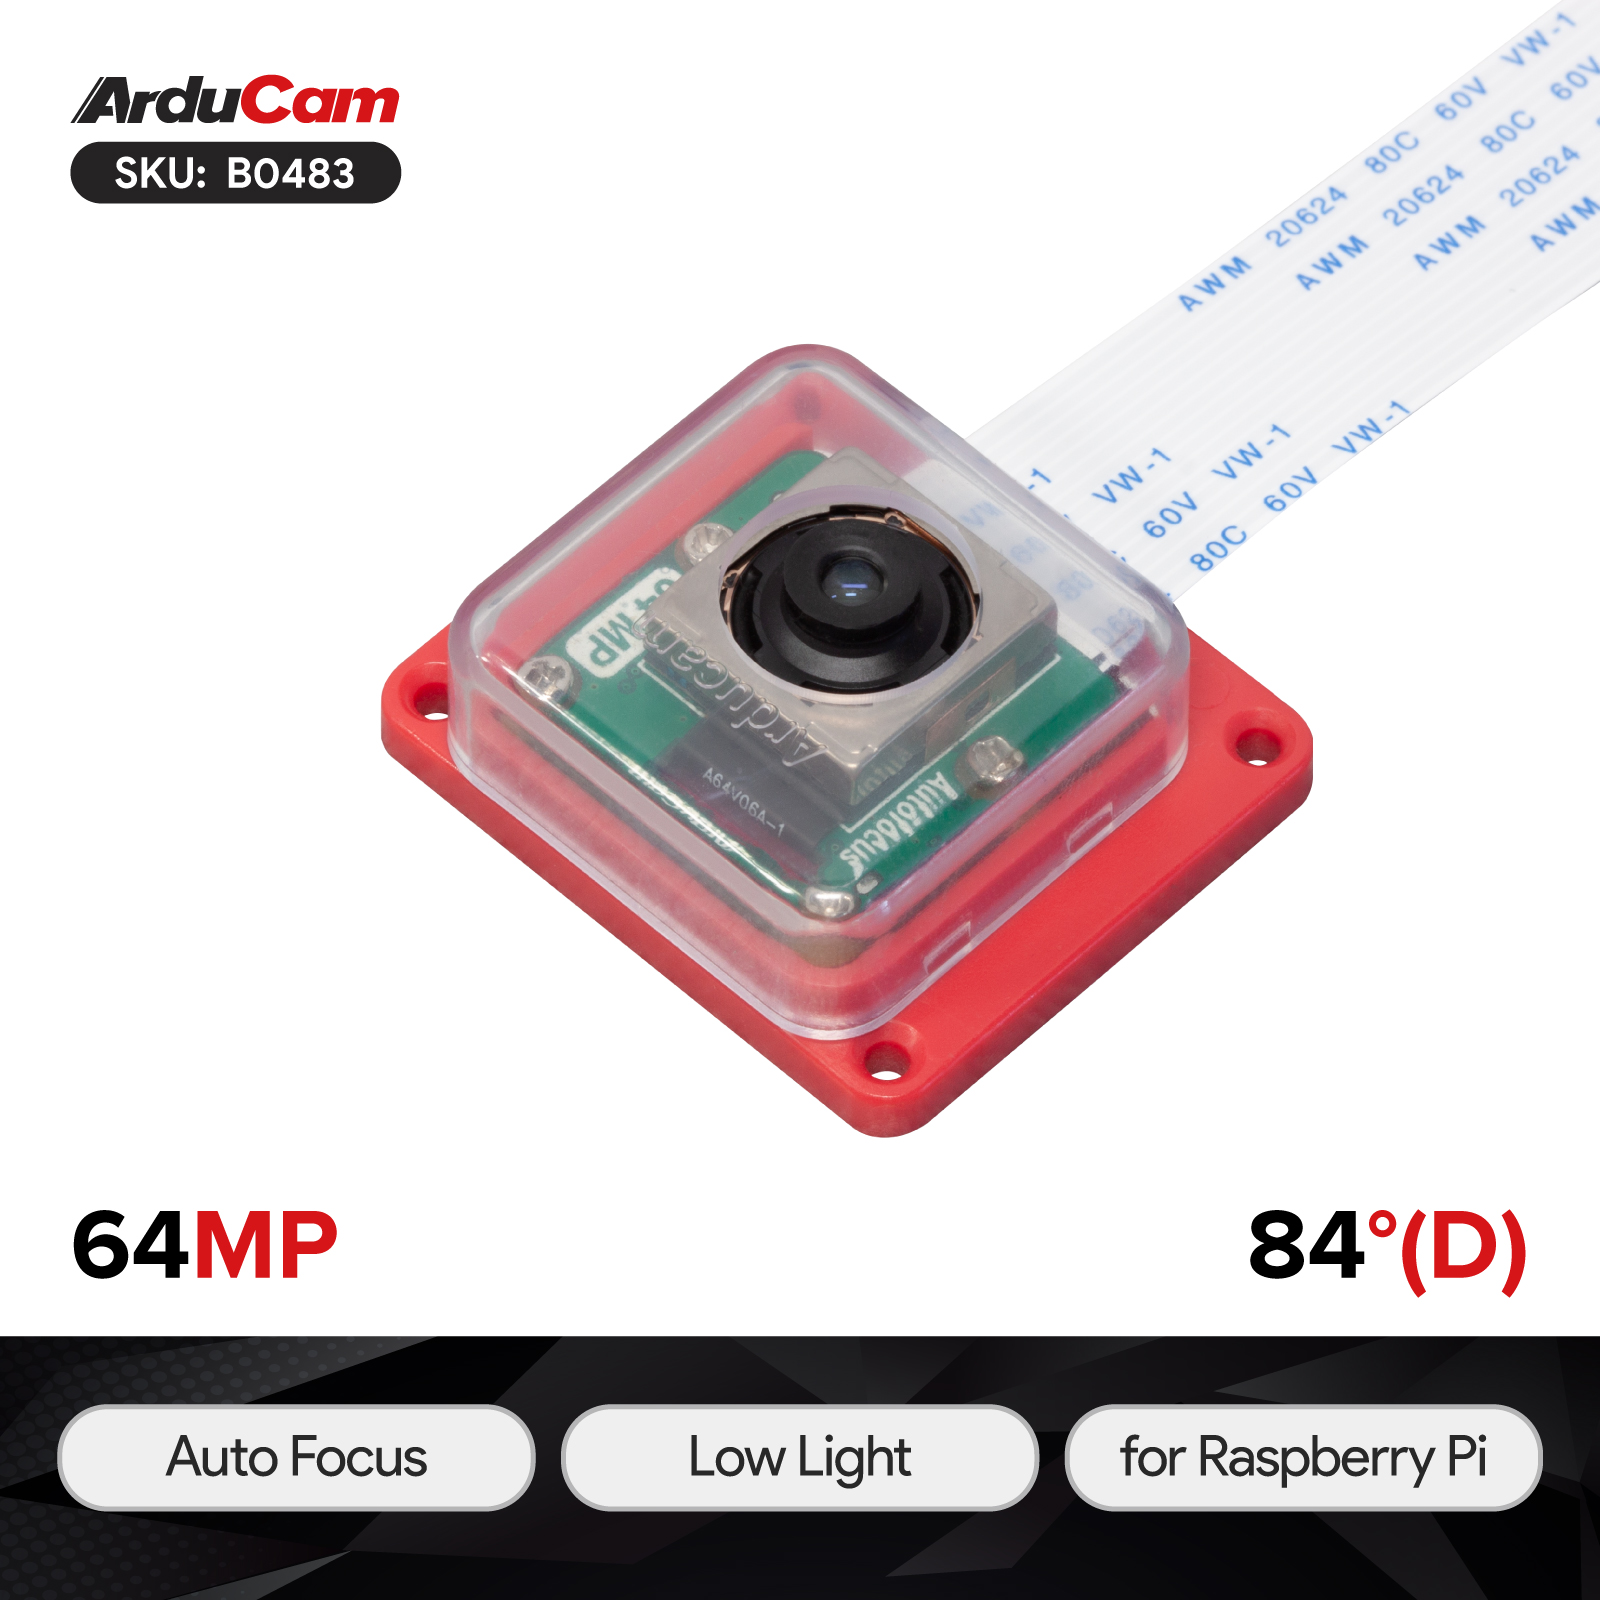 |
B0483 | 64MP | OV64A40 | MIPI CSI-2 | Ultra High Resolution | Manual/Autofocus | 12cm-infinite | 84°(D)x68°(H)x56°(V) | Integral IR-cut Filter |
Platform Compatibility
Supported Operating Systems
| Platform | Trixie | Bookworm (rpicam) |
|---|---|---|
| Raspberry Pi 5 / CM5 | ✅ | ✅ |
| Raspberry Pi 4B / 3B+ / 3A+ / Zero / Zero 2 W | ✅ | ✅ |
| Raspberry Pi CM3 / CM3+ / CM4 Requires adapter board |
✅ | ✅ |
Operating System Support
This documentation focuses on Trixie, Bookworm to align with the official Raspberry Pi OS release cycle.
Hardware Connection
Connect your camera module by selecting the tab that corresponds to your Raspberry Pi model.
Connection Principle
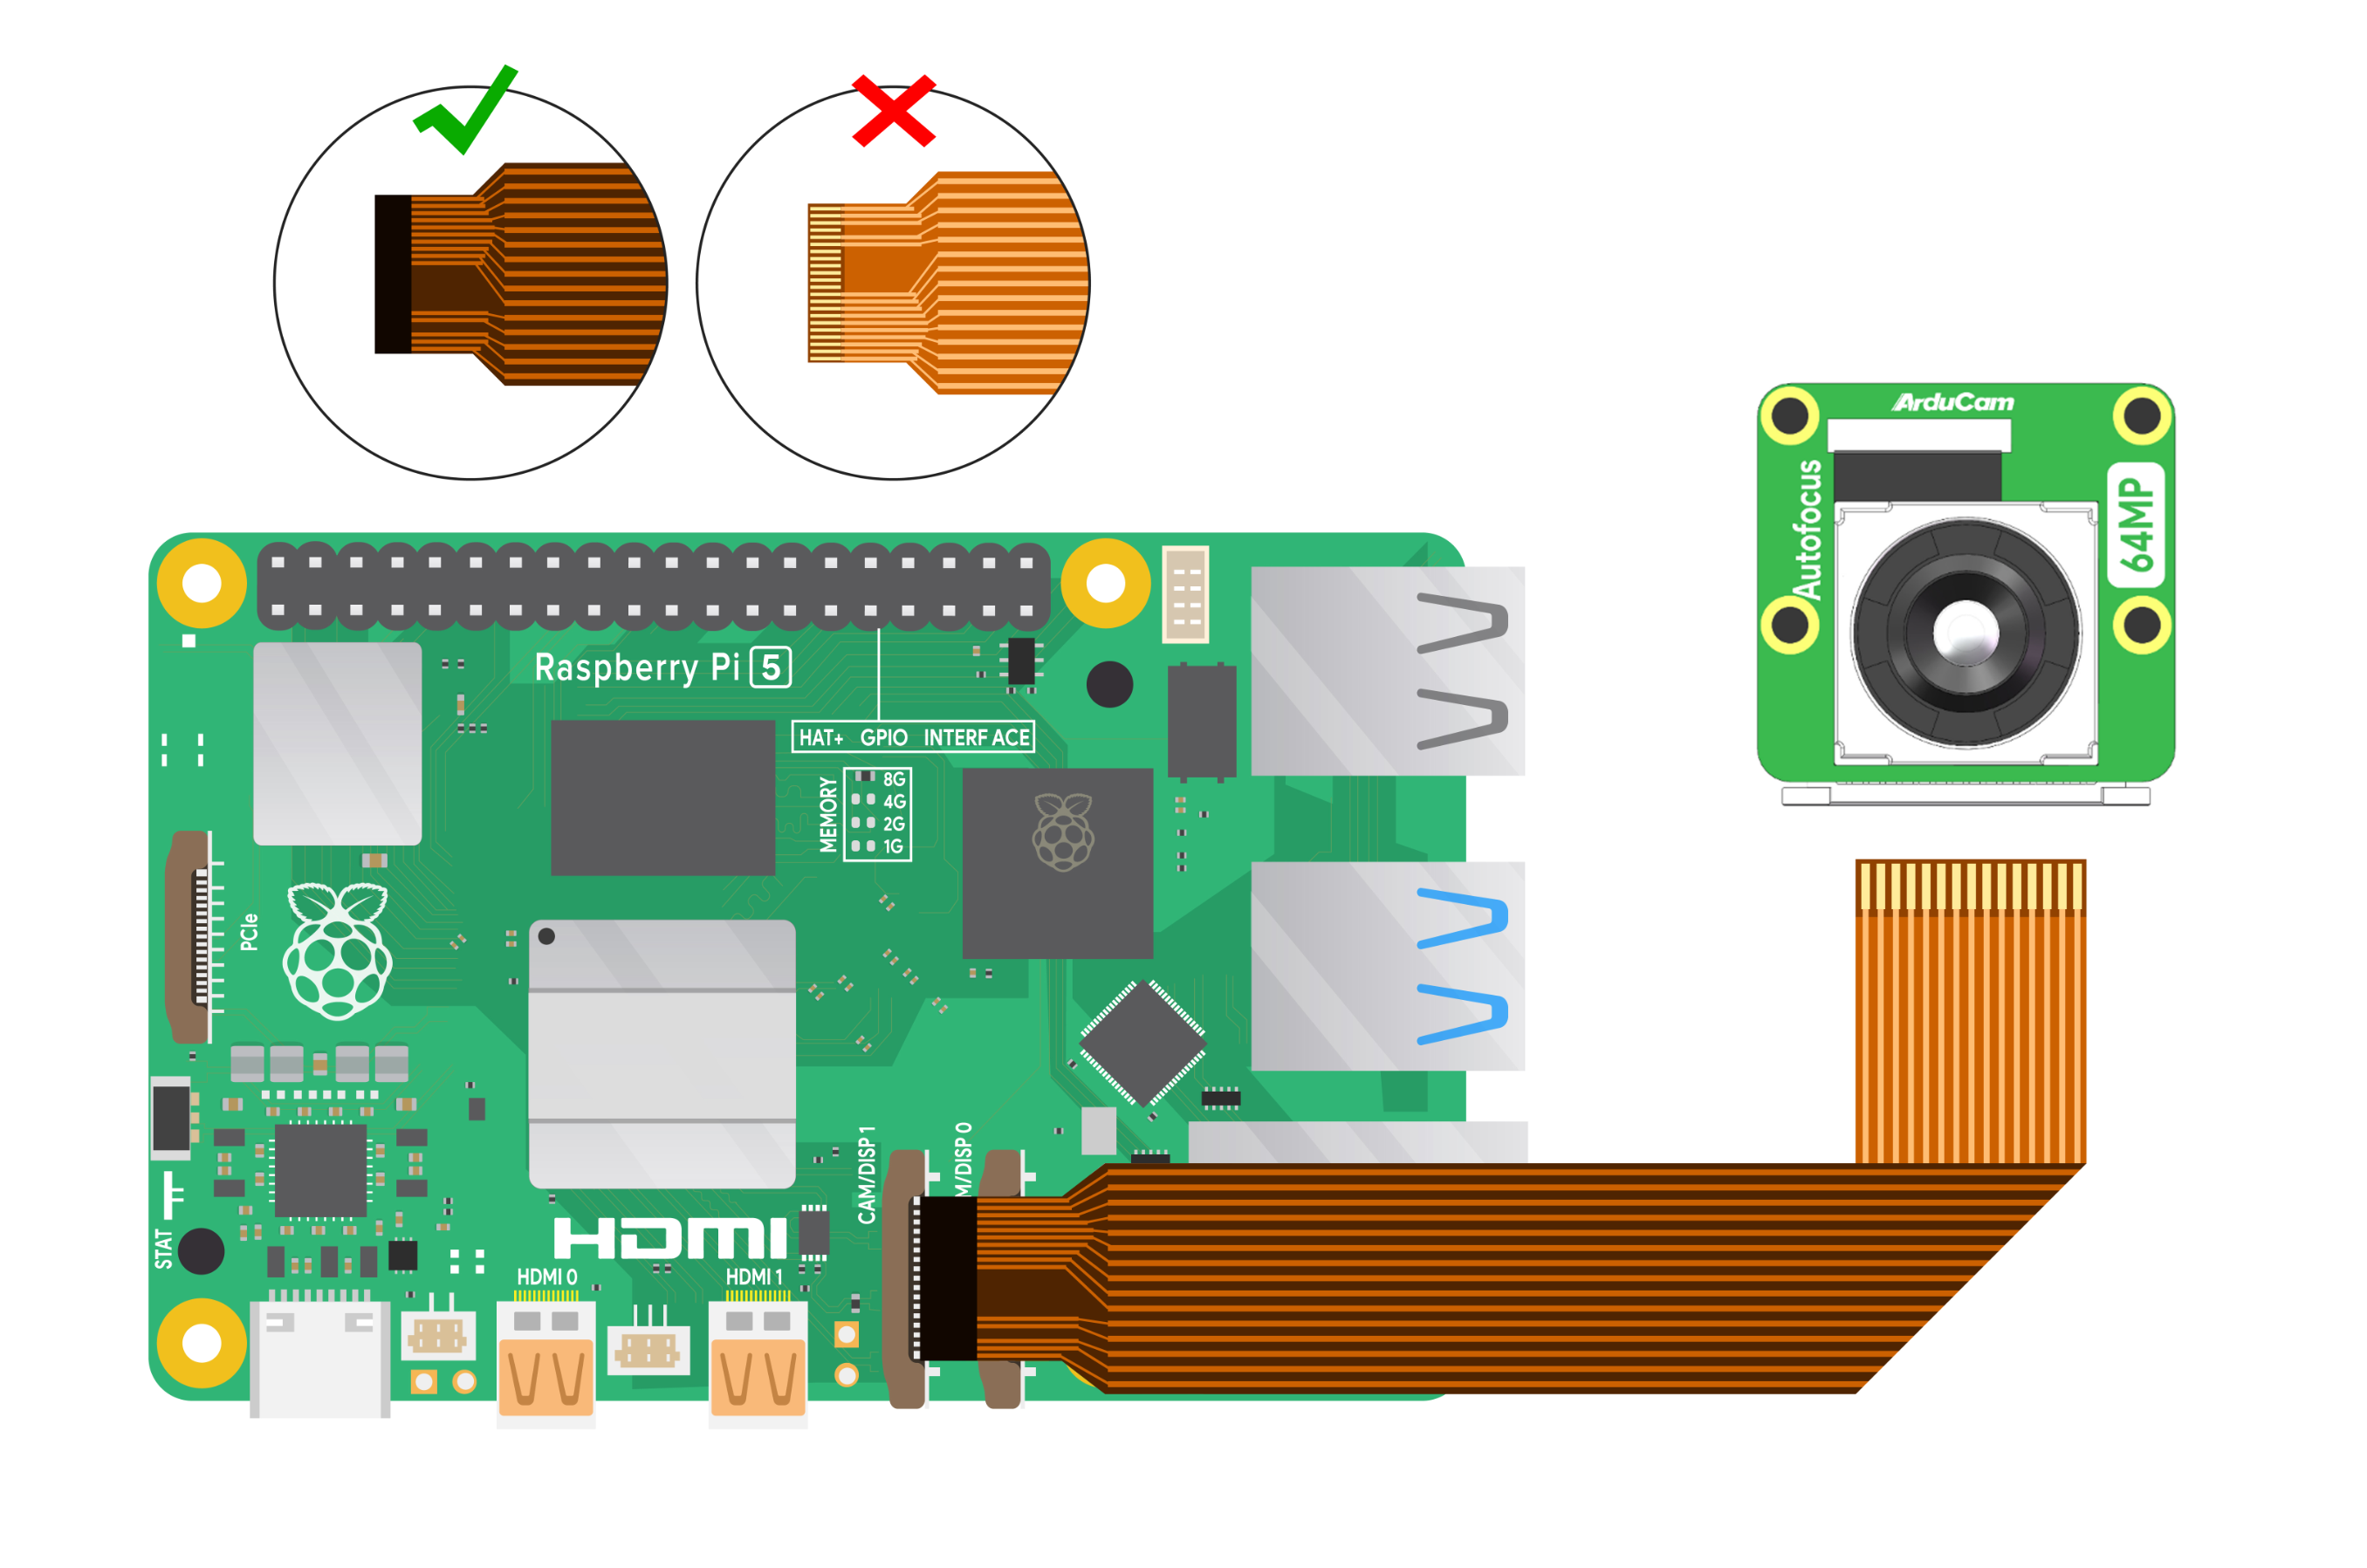
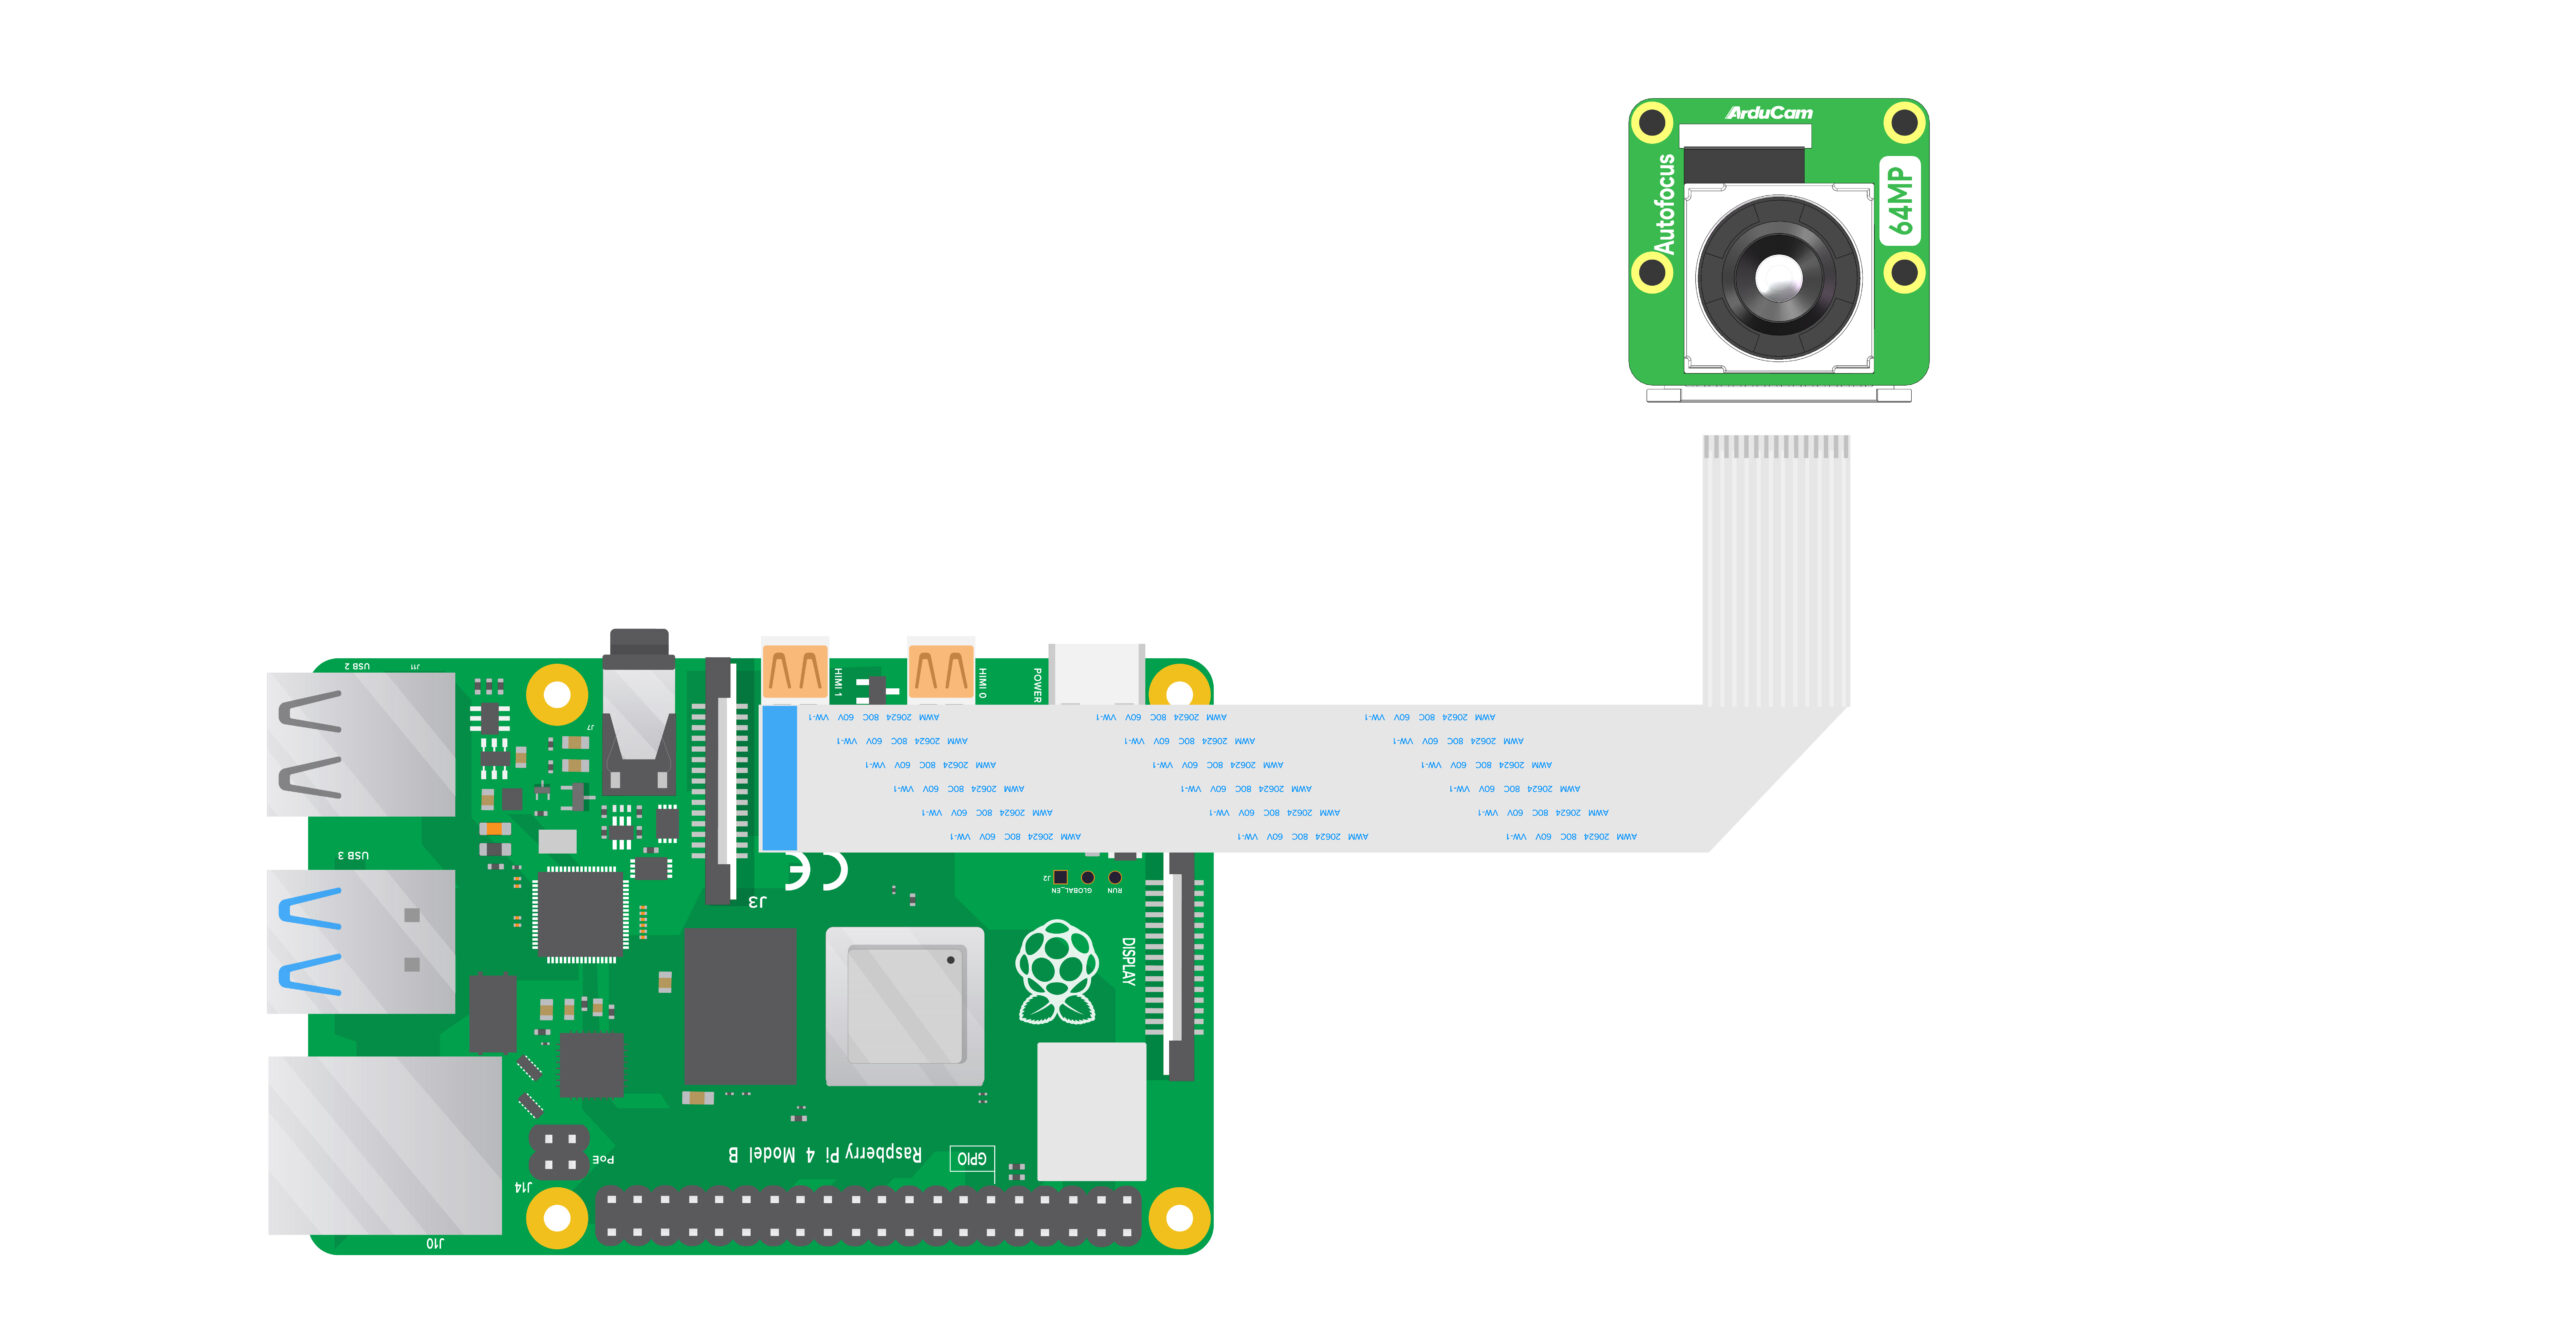
The core principle is to connect the camera to the MIPI CSI (Camera Serial Interface) port on your Raspberry Pi. Ensure the cable is inserted correctly with the metal contacts properly seated.
Using the 15-pin to 22-pin FPC cable, connect your camera to one of the dual MIPI CSI ports on your Raspberry Pi 5. Ensure the black tab on the cable faces the HDMI ports.
Using the 15-pin to 15-pin FFC cable, connect the flexible flat cable to the full-size MIPI CSI port located between the audio/video jack and the HDMI port. The blue tab on the cable should face the Ethernet port.
If you cannot find your Raspberry Pi model above, please refer to the following doc for common hardware connection method of RPI Camera:
Quick Start Guide - Hardware Connection
Software Configuration
This section guides you through the necessary software configuration to enable your OwlEye camera, followed by instructions on how to use it. The process is divided into these main parts:
- System Configuration: The required first step for the Raspberry Pi to recognize the camera. A reboot is required for changes to take effect.
- Camera Usage: Basic commands to preview and capture images.
- Advanced Usage: Optional steps for controlling features like autofocus.
- Long Exposure Photography: Instructions for capturing long exposure images.
1. System Configuration
Note
The Arducam OwlEye camera is natively supported on Raspberry Pi OS Bookworm and Trixie only. Bullseye and older versions are not supported.
The configuration process is similar for all compatible Raspberry Pi models, with the configuration file always located at /boot/firmware/config.txt.
Raspberry Pi 5 & CM5
-
Open the configuration file for editing:
sudo nano /boot/firmware/config.txt -
Find the line
camera_auto_detect=1and change it to0. -
Locate the
[all]section and add one of the followingdtoverlaylines below it. This enables the camera and sets its speed.This mode offers maximum stability, especially with longer camera cables.
dtoverlay=ov64a40,link-frequency=360000000This mode provides higher frame rates.
dtoverlay=ov64a40,link-frequency=456000000 -
Save the file and reboot your Raspberry Pi.
sudo reboot
Using the CAM0 Port
The Pi 5 defaults to CAM1. If your camera is connected to the port labeled CAM0, you must append ,cam0 to the dtoverlay line. For example:
dtoverlay=ov64a40,cam0,link-frequency=360000000
Raspberry Pi 4, Pi Zero to Pi 3, & CM3/4
The process is the same for these models, as they all run Bookworm/Trixie with the same file structure.
-
Open the configuration file:
sudo nano /boot/firmware/config.txt -
Set
camera_auto_detect=0. -
Add the
dtoverlayline under[all], choosing your desired speed mode.- For Low-Speed:
dtoverlay=ov64a40,link-frequency=360000000 - For High-Speed:
dtoverlay=ov64a40,link-frequency=456000000
- For Low-Speed:
-
Save the file and reboot.
Using CAM0 on Compute Modules
If you are using a Compute Module (CM3/4) and have the camera connected to the CAM0 interface, append ,cam0 to your chosen dtoverlay line.
2. Camera Usage
After rebooting, your camera is ready. On Bookworm and Trixie, the rpicam-apps suite is used.
-
Confirm camera detection by listing available cameras:
rpicam-still --list-cameras -
Start a live preview (Press
Ctrl+Cto exit):rpicam-still -t 0 -
Capture an image named
test.jpgafter a 5-second preview:rpicam-still -t 5000 -o test.jpg
3. Advanced Usage: Focus & Zoom Control
The OwlEye camera supports several focus modes.
-
Continuous Autofocus:
rpicam-still -t 0 --autofocus-mode continuous -
Single Autofocus (before preview starts):
rpicam-still -t 0 --autofocus-mode auto -
Manual Focus with Keyboard Control: For interactive manual focus, Arducam's extended
libcamera-appsare recommended as they provide keyboard controls.- Install Arducam's libcamera software:
wget -O install_pivariety_pkgs.sh https://github.com/ArduCAM/Arducam-Pivariety-V4L2-Driver/releases/download/install_script/install_pivariety_pkgs.sh chmod +x install_pivariety_pkgs.sh ./install_pivariety_pkgs.sh -p libcamera_dev ./install_pivariety_pkgs.sh -p libcamera_apps - Run in manual focus preview mode:
rpicam-still -t 0 --autofocus-mode manual -k - Use the following keys in the terminal window to adjust focus:
F(trigger auto),A(move lens away),D(move lens towards).
- Install Arducam's libcamera software:
-
Zoom Control: Please refer to the following program to control the zoom function:
4. Long Exposure Photography
The OwlEye camera is capable of long exposure photography, making it suitable for low-light conditions. The maximum possible exposure time depends on the selected resolution and the MIPI link frequency.
Maximum Exposure Time
Low-Speed Mode (link-frequency=360000000)
| Resolution | Max Exposure Time (seconds) |
|---|---|
| 1280 × 720 | 204.01 |
| 1920 × 1080 | 304.22 |
| 2312 × 1736 | 336.43 |
| 3840 × 2160 | 492.57 |
| 4624 × 3472 | 608.45 |
| 8000 × 6000 | 1059.42 |
| 9248 × 6944 | 1173.95 |
High-Speed Mode (link-frequency=456000000)
| Resolution | Max Exposure Time (seconds) |
|---|---|
| 1280 × 720 | 146.74 |
| 1920 × 1080 | 196.85 |
| 2312 × 1736 | 279.17 |
| 3840 × 2160 | 378.04 |
| 4624 × 3472 | 472.44 |
| 8000 × 6000 | 860.78 |
| 9248 × 6944 | 910.88 |
Capturing Long Exposure Images
To perform a long exposure shot, you need to set the --shutter parameter, which is specified in microseconds (μs).
--shutter: Sets a fixed exposure time in microseconds. (1 second = 1,000,000 μs)-t: Sets the total program run time in milliseconds (ms). This must be longer than the shutter speed.-o: Specifies the output filename.
Usage Examples
Set exposure time to 1 second:
rpicam-still -t 2000 --shutter 1000000 -o shutter_1s.jpg
Set exposure time to 5 seconds:
rpicam-still -t 6000 --shutter 5000000 -o shutter_5s.jpg
Set exposure time to 10 seconds:
rpicam-still -t 11000 --shutter 10000000 -o shutter_10s.jpg
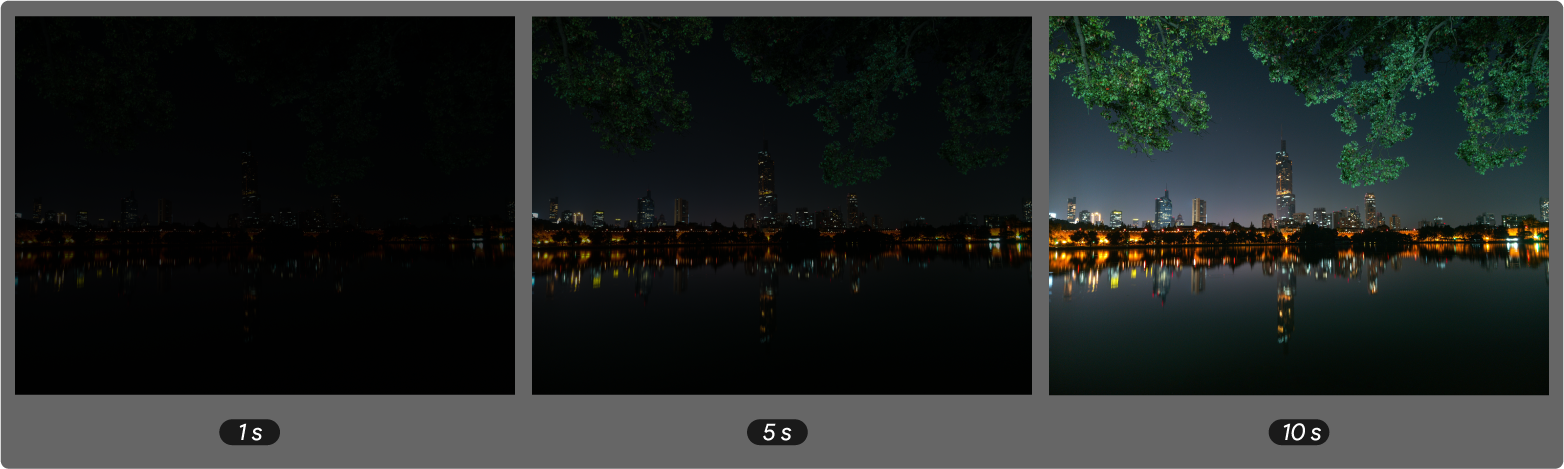
Comparison
The following image demonstrates the dramatic difference long exposure can make in low-light environments.
Recommended Accessories
-
ABS Camera Case SKU: U6251
Get it Now
-
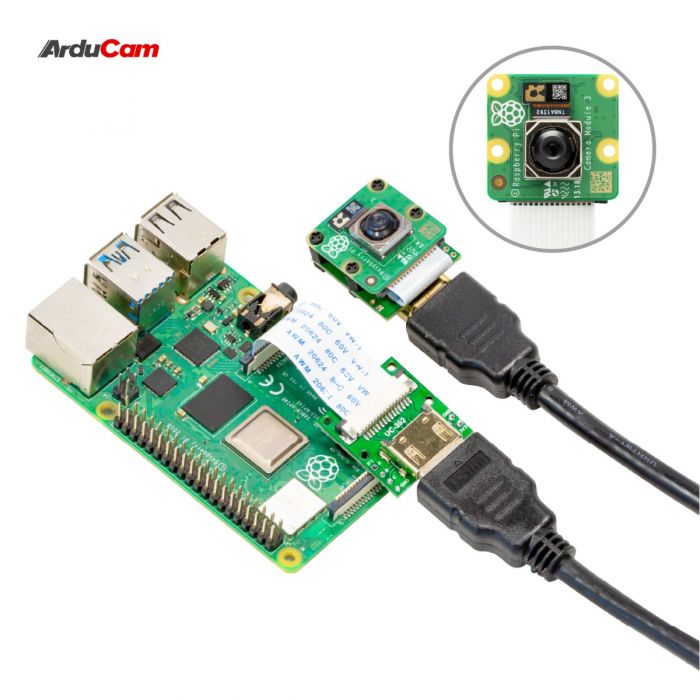
HDMI Extension Kit SKU: B0091
Get it Now More Details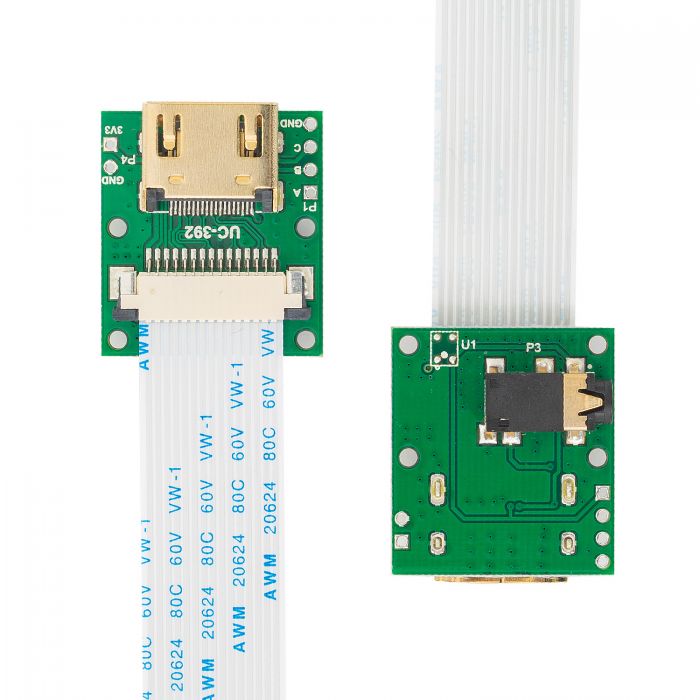
-
Ethernet Extension Kit SKU: U6279
Get it Now More Details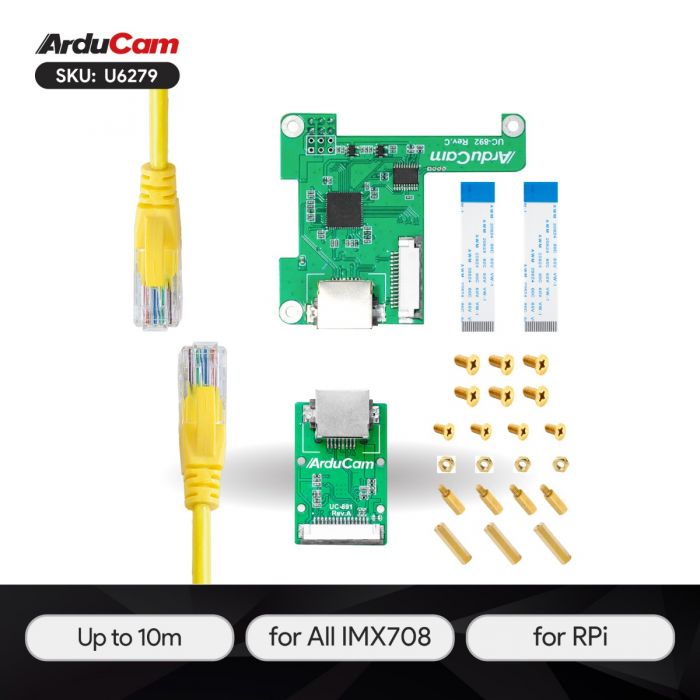

-
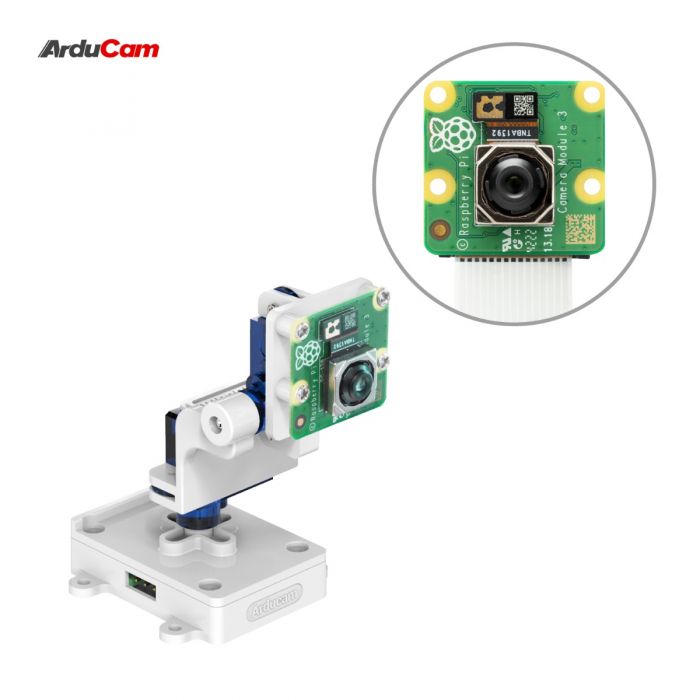
Pan-Tilt Kit SKU: B0283
Get it Now More Details
-
Pi Zero Cable (15-pin to 22-pin) SKU: B0210
Get it Now More Details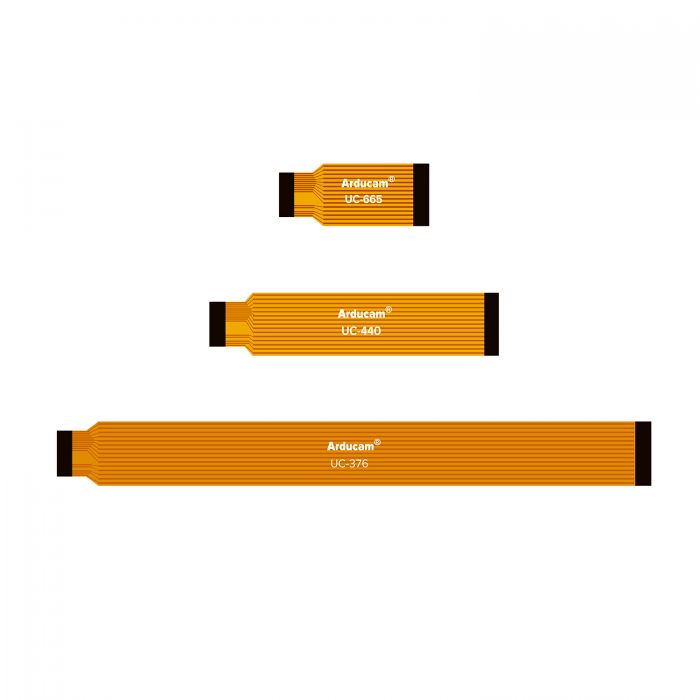
-
100cm Extension Cable (15-pin) SKU: CB012
Get it Now More Details